Ron's 300G Tank Move and In-Wall Installation

Yep. I'm going to go with both options. I already threw in another 2x4 for support on the corner. I'm going to add a removable center brace as well...just to be sure it's extra strong.

The stand did come in extra handy when we were hanging sheetrock! It seemed pretty strong, but you could get it to move a little if you tried hard enough.

Maybe I'll post some more pics later today.
 
OK...here's a little update.

When building the stand, we made sure it was level. I'm told that a large tank must be level, so we used an 8' level to make sure it was as dead on as we could get it. I'm still going to use the pink foam insulation stuff.

DSC00849.jpg
alt="">

Once we leveled the stand we started with the sheetrock. As you can see, we had to make a cutout for the garage door. Yep, the tank is going to cost me about 3/4 of a car width of garage space. The room is a little weird shaped, but will work great for a fish room. BTW, the little "window" looking thing is the cutout for the air conditioner. It gets hot around here...

DSC00855.jpg
alt="">

Here's the insulation we put in. It's R-13...hope it's good enough!

DSC00856.jpg
alt="">

Here's a similar pic once we covered the insulation with sheetrock but before floating.

DSC00863.jpg
alt="">

We finished hanging and floating all the sheetrock yesterday. I'll get some more pics today.

Hope you enjoy.
 
Ron, it looks like my advice is too late, but if you have the ability to run a ton of outlets in your new walls, do it.

Including one up high for your A/C unit.
 
Yep, it's a little too late to run a bunch more outlets. I guess I could run them in conduit though.

I do have 3 outlets in the room. One on each side of the tank and one over the tank. I also have two DJ power 8 position power switches. So that gives me a total of 18 outlets. I was thinking that would be enough. But now thinking about it, an extra outlet or two along the wall with the door would have been good.
 
Man you guys have been working since I dropped that aquarium off. It's gonna be an awesome addition to an already beautiful home.

Call me if you have any questions everything is looking great!!
 
@TriggaFish99 wrote:
[img]http://img.photobucket.com/albums/v192/t_ron99/Fish%20Stuff/Fish%20Room%20Build/DSC00852.jpg[/img] alt=""> said:
I think you cut your wall to big for that 6 gallon tank....heheheheeee

Looks good

Is your tankgoing to be a fish only or coral tank?
 
Well I had my first setback today.

When we put the tank in the garage we figured it would take 4 people to put it on the stand. We were wrong. We tried tonight, but lifting it that high proved to be too much for 4 people.

I'm going to try to round up some friends and see if we can get it up there tonight. If not, anyone close to Rockwall bored on a Friday Night? I'll try again tomorrow. If I get a few helpers, I'll set up a specific time. I'll also have more time to make sure we have cold beer on hand in case someone gets thirsty.

I'll post later if we don't get'r done tonight.
 
Whew. That was a hairy experience.

Ben (bdare) saved the day! Thanks Ben!

We had a total of 7 people help put the tank on the stand....but it's there now. We may have been able to get by with 6, but I was happy with 7! I'll throw up some pics tomorrow. When the original four of us tried to put the tank on the stand, we couldn't make the transition from waist level to chest level. So we started to figure out a way to help with the transition. Here's what we did before Ben showed up.

We stacked 8 buckets (4 sets of two) to get to the height that we could get underneath the tank. If you look a couple of pics back where the stand is sitting on 4 salt buckets...just stack another row on them and you'll get the idea. When Ben, one of my friends Ross, and one of my son's friends showed up, all we had to do was get under the tank and lift it to shoulder height. That was the ticket.

NOTE 1: I cut the pink foam so it was wedged against the front wall and between two studs. The idea was to have the foam wedged so I wouldn't move. Believe it or not...it worked. The foam stayed almost exactly where I placed it. :lol:

NOTE 2: A big tank like that can still slide across pink foam if it's wedged properly. I was concerned that the foam wouldn't stay in place...but it did fine. Maybe it was some of the sheetrock dust on the surface that helped. After sanding & painting yesterday, I'm sure there was a slight layer of dust on the foam.

Once again THANKS Ben!
 
OK...Here's for all you pic hungry folks. One of the earlier problems was stand support in the right corner. Originally I only had two 2x4 supports. Someone asked how they are supported. Here's some pics with an additional 2x4 added for security.

In the first pic you are looking from under the stand looking out. Second pic is looking straight on at the right corner. The third pic is looking from the right side of the tank longways. Hope this makes sense.

DSC00886.jpg
alt="">
DSC00887.jpg
alt="">
DSC00888.jpg
alt="">

You can see in the first pic, I had to notch out a little extra for room around the overflows. Just ignore the paint drips. I intended to do that for extra protection against moisture seepage. :oops:
 
Since you had to notch that apron, is there anything else that can be done to beef it back up? The support in the corner looks ok but I don't like removing a dado from a piece that big. I'm not sure if sistering another 2x6 on the outside would do it running all the way to the corner of the stand.
 
Another 2x4 under that notched area would support that back run nicely, and still be out of the way.
 
Yep, I put a 2x4 removable center brace in. I don't know if I'll ever move it, but if I have to, I can. So now across the back I should have plenty of support.

I've been busy over the last two days. Yesterday, I filled the tank with freshwater. Since the stand held, I figured I'd do the plumbing today.

I went a little crazy with the plumbing, but I think it'll be worth it in the long run. I wanted to maximize both the overflow and return pump's water movement to help eliminate unnecessary pumps.

The right overflow will feed the skimmer and excess water will go to the sump/fuge. I'm using the same sump/fuge that I had on the old tank for now.

The left overflow has a smooth "T". One side goes to the sump. The other one is currently going to a valve that's shut off. I can add something else later if necessary....or I just want to.

Both retrun pumps have a two outlet manifold "T"ed" to them. I'll use two from one pump for the Phosban and Carbon I run. The other two will just be shut off until I need them. I'll take some pics in the morning. Hopefully I'll get them up some time tomorrow.

I have the freshwater circulating through the tank now using one of my return pumps from my other tank. Yet anther reason I like having two smaller return pumps vs. one large one. :wink:

So to sum up:
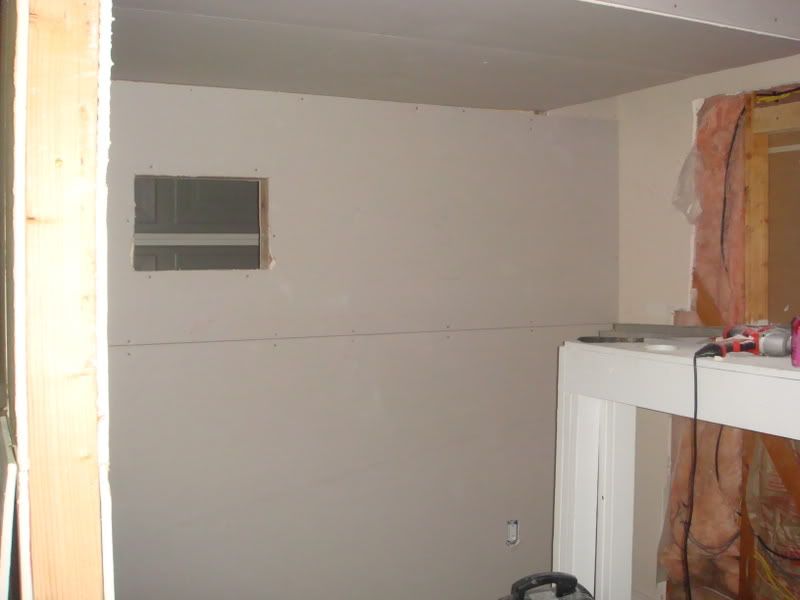
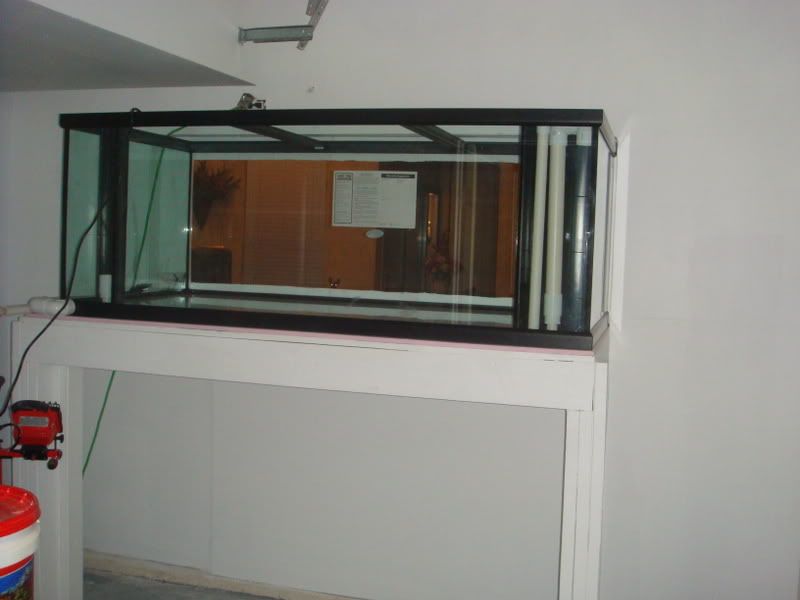
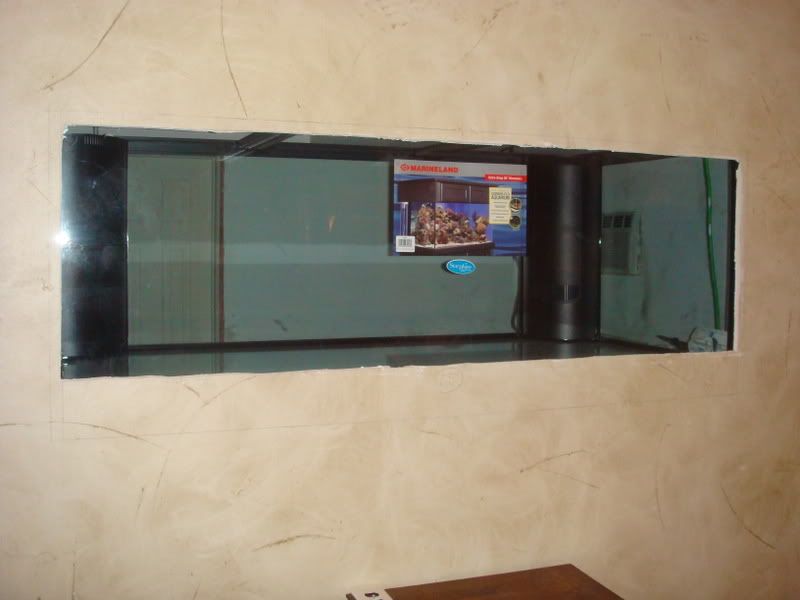
Big hole cut in my living room wall
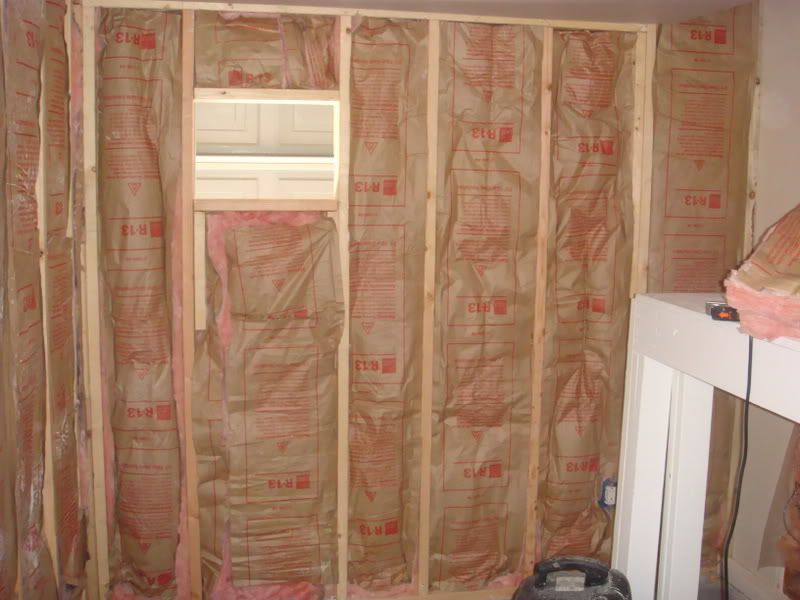
Room built & sealed
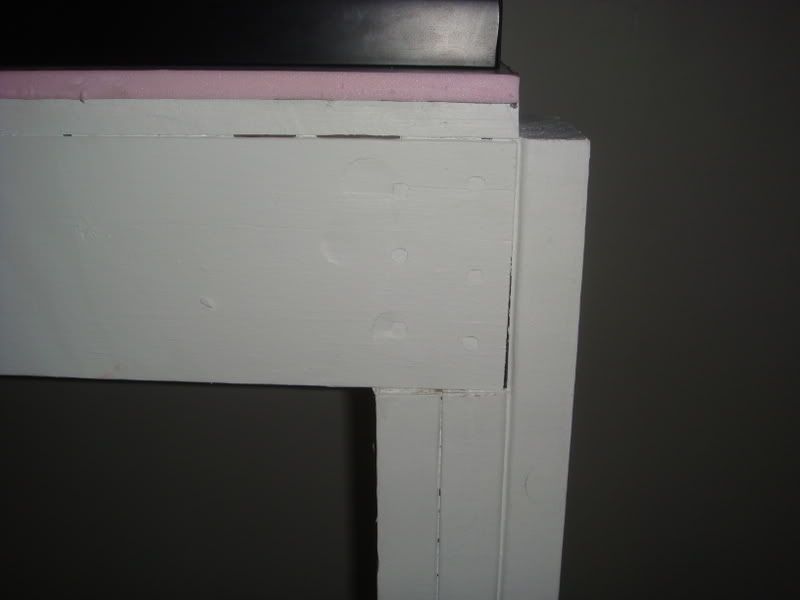
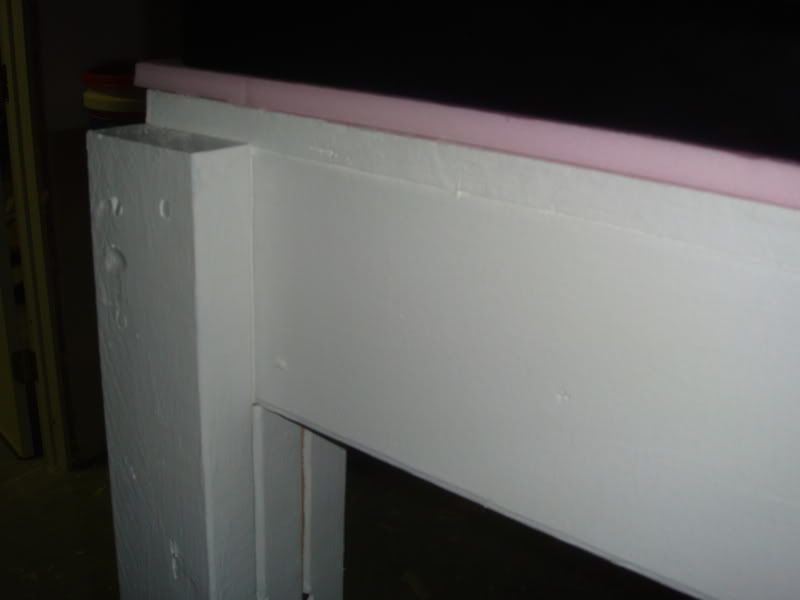
Stand built and sealed (except for the new center 2x4 brace)
Tank filled with water
Plumbing done
Water circulating

Tomorrow, I'll start moving some of the sump/skimmer, live rock, and lights over from the old tank. I'm not sure how far Ill get....but I'll keep ya posted.

Just to make things more interesting, my sister and her family are evacuating from New Orleans for the hurricane. So, I'll have some family over for the weekend. That will be cool.
 
I guess I'll throw up a few pics for you pic hungry folks.

Here's the tank on the stand from the back.
DSC00885.jpg
alt="">

Here's what it looks like from my living room. Still don't have the frame/molding up yet.
DSC00881.jpg
alt="">

I didn't notice it when I took the pic, but you can see the a/c through the tank...kinda cool.

Hope that keeps y'all happy until I can take a few more and download pics from my camera.
 
Ron , are you planning on any access from the front of the tank. That 30" is a long way to reach from the back to the front.
 
I like it Ron. I cannot wait for the day where I can get an in wall setup. It makes hiding all the equipment much easier and all you have is pure tank. Keep us updated.
 
Dennis,

Yes, I'm planning on access from the front....just not sure how I'm going to do it.

Also, I had a delay....My sister evacuated from New Orleans...so I didn't get squat done on the tank until Saturday. But, I've moved most of the rock over. It's not set up (aquascaped) yet...the rocks are just put in the tank as best as I could fit them in the cloudy water. I'll start putting the rocks how I like them today after work.

Fish have been doing fine in the 150 watering trough I got from Dane. I did have the rocks & fish in there. It was pretty packed. Sorry for not getting a picture, but let's just say it was unique feeding the fish from above. They were a little shy due to the move, but quickly came around after the food started hitting the water!

I only have a few rocks, corals, sump/fuge to bring over to the new tank. Then lastly, I'll move the fish.

I do have some pics from the last few day. I'll get some posted soon.
 
Hole Saw

Does anyone have a hole saw I could use to cut a bulkhead into a tank? I'm going to make another 55 gallon fuge in the near future. If there's not a club one available, I'll be willing to buy one, but don't know where to get it. Any recommendations on where I might get one?
 
@TriggaFish99 wrote:
Hole Saw Does anyone have a hole saw I could use to cut a bulkhead into a tank? I'm going to make another 55 gallon fuge in the near future. If there's not a club one available said:
If you can't get one from the club, the best place to get one is eBay from the seller Mao (I think that's the name). I got 3 different size bits delivered for like $20. They definitely work well!

Ben
 
Top