New 120 on the way

BTW, anyone that is reading this, I need to find some plastic clamps to secure flex hose to barb fittings. Anyone know where I can find these locally? I have some metal ones, but I'd rather get plastic.

Thanks,
Chris
 
Thanks John, I'll have to check them out. You wouldn't know if they have flexible pvc glue by any chance.

Chris
 
Well, I finally got most of the plubming done, at least the plumbing to the sump. I had a little issue w/ the 1.5" returns from the mag 9.5 pump, so I ended up scrapping it to go w/ 3/4" instead. I know this will limit the flow (according to the flow calculator ~ 200 gph) but the majority of the flow in the tank will be handled by my CL and penductors. The mag pump is a little noisy, at least more noisy then I remember it being. I tried to put a small mouse pad underneath it, but it seems to be transferring the noise and vibration to the pipe. Should I install a small portion of flex pvc to help this?

I still have to install the CL and the skimmer plumbing, but I'm waiting on some spa flex glue. I hung the light brackets as well.

And on to the pictures.

Light brackets:
P6220018.jpg
alt="">

Light brackets mounted 18" above the tank:
[
P6220019.jpg
alt="">

Closed loop over the top plumbing plan:
P6220024.jpg
alt="">

Left side plumbing:
P6260027.jpg
alt="">

Right side plumbing:
P6260028.jpg
alt="">

**Both drains are separate, left side goes to the skimmer compartment and the right side goes to the fuge.**

Full frontal:
P6260029.jpg
alt="">

A little farther back:
P6260030.jpg
alt="">

Bracket to hold the top-off water, ca reactor return, etc.
P6260031.jpg
alt="">

Here is the bracket placed:
P6260032.jpg
alt="">

Chris
 
I forgot to mention that I mocked up my DIY calcium reactor yesterday while we were having a garage sale. Didn't take but 20 minutes to cut the pvc. I've got to glue and fit all the pieces but that shouldn't take too long. It's based off wmTasker's thread on RC: (I used 1/2" pvc instead of flex tubing based on page 5 of that thread, em21701's design)

http://www.reefcentral.com/forums/showthread.php?s=&threadid=587186

I still have to get the regulator, etc. but I have the reactor done. Can't beat that for only $65.

Chris

P6260034.jpg
alt="">

P6260035.jpg
alt="">
 
Man, this a great thread with lots of great DIY information.

For the glue for spa flex, Home Depot sells it. Just ask the guy in that department and he'll point you to the right kind. I've used the regular stuff (purple primer, clear cement) with no problems, but there is one solvent that is more golden honey color (or tan) that is the proper kind.

I like your little tubing holders. Great idea... I'm going to steal that concept one day. :lol:

Any plans to camouflage the hanging brackets, maybe with a shelf and some plants perhaps?

Where did you find black PVC?!
 
Thanks Marc.

The black PVC is actually black spray paint. I had an extra can laying around and I figured that it would make it look a little cleaner. I need to paint the 3/4" pvc when I get a chance.

About the tube holder, I figured that it was easier to do that then try and silicone them to the side of the sump. I still need to mount my dual float switches.

My wife thinks that DIY is a bit of a waste of time, mainly b/c I have to go back and forth to sLowes numerous times. I don't mind it, besides the fact that the closets sLowes is 15 min. away.

I don't think that the hanging brackets will be much of a concern once it's all put together, they are about 9 ft. off the ground. I may put some type of plant that doesn't require much water though.

I'll have to look around at HD or sLowes for that cement.

Chris
 
I finished the plumbing for my MR-2 last night. I drained the sump and figured out the placement for my 2 PCX-55 pumps. The skimmer pump will sit next to the sump and the CL pump will be behind the sump on a small wooden stand. Both pumps will be mounted on carpet to help dampen the vibration.

Anyways, on to the pictures:

Here is a picture of the pump glued and ready to go. I ended up using Oatey Rain R Shine PVC Cement. I talked to a gentleman from that company yesterday and he said that product would work fine on flex PVC. They make a flexible PVC glue, but I couldn't find it locally and I didn't want to wait to have it shipped.

P6290082.jpg
alt="">

Here is a picture looking from the left side of the tank down through the sump. I put the pump up on 2 small blocks of wood covered by carpet (not pictured) to lessen the vibration. I had to lift the skimmer off the bottom of the sump b/c the sump water level was too high. I built a small eggcrate box to lift it off the sump floor. In this picture you can also see the ca reactor feed plumbed off the return pump. I'm going to try and eliminate all unnecessary pumps by t-ing them off the return pump.

P6290084-1.jpg
alt="">

Here is a picture of the skimmer input from the pump. Nothing too special here, just showing the DIY beckett injector housing.

P6290085.jpg
alt="">

While I was feeling productive, I went ahead and changed out the RO filters and installed a new DI cartridge w/ color changing resin. Pretty neat stuff. I'm now getting 1 ppm tds reading through the RO filter and 0 ppm after the DI filter. Here is a picture of the sediment filter and the 2 carbon blocks that I removed. This system sat around for about 4 months while I moved home before I bought my house. I probably should have installed new filters before this. Pretty nasty stuff, especially the sediment filter, which is supposed to be bright white, not urine yellow.

P6290072.jpg
alt="">

Here is the new RO/DI filter installed. I took off the final carbon filter b/c it is supposed to add "taste" back into the h2o. Not something I think my fish really need. I do have a question though, should I install a 't' before the DI filter to remove the first couple of minutes of h2o that come out (roughly 50 ppm).

P6290073.jpg
alt="">

As always, thanks for looking.

Chris
 
If you'd like to bleed off the first 2 minutes of water, you can. That is considered the TDS-creep that some try to avoid.

I run my unit about every 2 or 3 days and don't have a problem, but I'm not that concerned about it.
 
Well, I don't know about the book, I've found most of the stuff on the internet and after talking w/ people, it seemed pretty easy, so I went with it. Hopefully it will all hold together. I still need to build a small stand for the ca reactor, skin the frame of the tank and build a small cabinet for the elect., ro/di top-off and other misc items.

Chris
 
Thanks for the tip Marc, I didn't see you post the last time I responded. I am trying to find a way to 't' off the ro/di line after the filters to remove that bit of creep.

Anyways, I started filling the tank this weekend. The sump is full and now I'm working on the rest of the tank. I finished the placement of the CL pump and I'm anxious to fire it up. I guess I'll have to wait until Wed at the rate my ro/di unit is going. Here are a few pictures of the placement of the pumps and Houdini, as always, is given his approval.

P7040094.jpg
alt="">

P7040086.jpg
alt="">

Thanks,
Chris
 
Chris, it looks like you had to insert some shims or wedges at the corners of the stand. If this is the case, try using lots of shims and spread them out more. You want to fill any and all gaps to avoid specific pressure points, which would lead to some of the tile possibly failing/cracking.
 
Thanks for the tip Marc. I put 6 carpet squares under the tank along w/ cardboard to level it. Do you think that I need more w/ a span of only 4'? I'm not sure that I'll be able to lift it now though, since it's filling w/ h2o.

Chris
 
Whatever you do, make it stable. Consider the future -- a small spill near the tank... what will happen to the cardboard?

Wooden shims, plastic shims - both would be good if you still need them. Just slip them in where you still see a gap or feel the need for reinforcement.
 
Well, I've gotten the tank filled up, salted and some base rock in. I added a little live rock to get the biological filtration working until I can move stuff over from my temp tank. No new pictures since I forgot to upload them last night. I did learn a few things about SW that I thought I would re-iterate to anyone setting up a new tank.

1. Gravity is a pain. You wouldn't think that a 1" pipe could have that much h2o it in, but it does.

2. Put ball valves and unions on every inlet/outlet of any pump, especially anything that is pulling a suction and works off gravity.

3. Salt h2o is heavier than fresh h2o. Fills the tank up faster.

4. 160 gallon buckets of salt hurt when they are dropped on your feet.

I'm hoping to get the lights hung tonight, after another trip to sLowes since a nut fell off my canopy rig.

BTW, anyone interested in my mangroves, I'm going to be putting them up for sale next week. $$$ or frags are welcome. I belive that I've got 10-12 for sale w/ 3 sets of leaves.

Thanks,
Chris
 
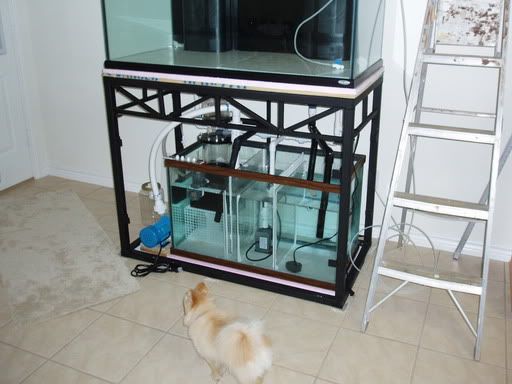
Plenty of work was accomplished this weekend, as stated in my last post, I filled the tank, put some base rock in and got the temp, salinity and pH up to par.

P7060013.jpg
alt="">

On Thursday afternoon, I transfered some LR to start the biological filtration.

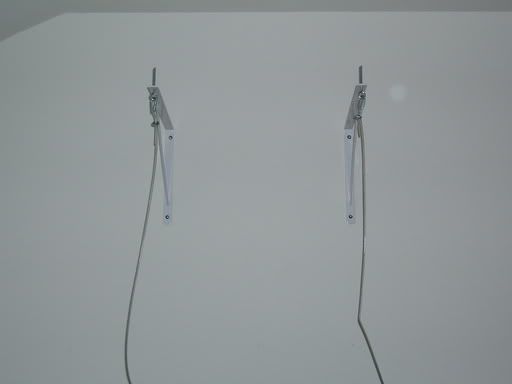
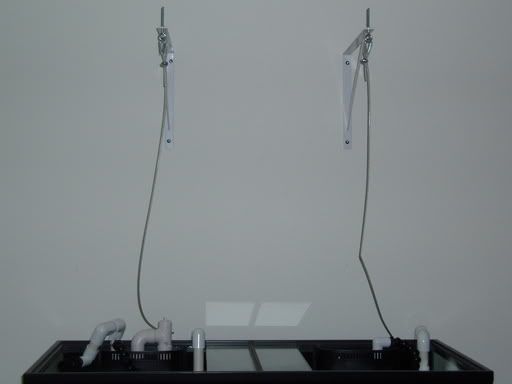
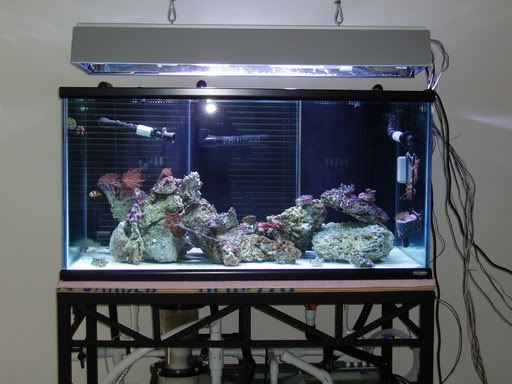
On Saturday, the yard was mowed, edged and cleaned, I was able to hang the canopy and put some of the live base rock, LR and corals into the tank:

P7090026.jpg
alt="">

P7090027.jpg
alt="">

P7100049.jpg
alt="">

P7090046.jpg
alt="">

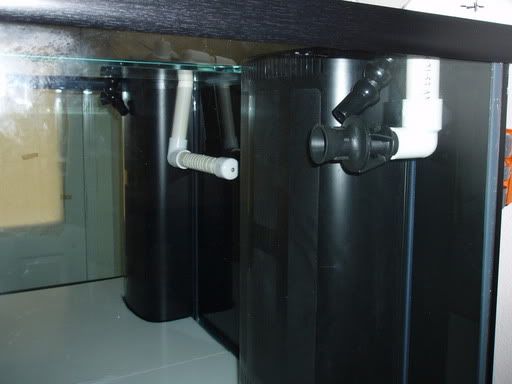
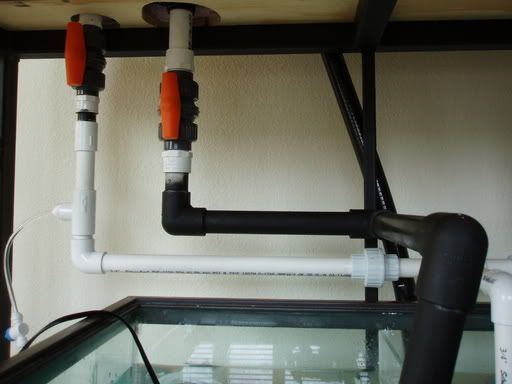
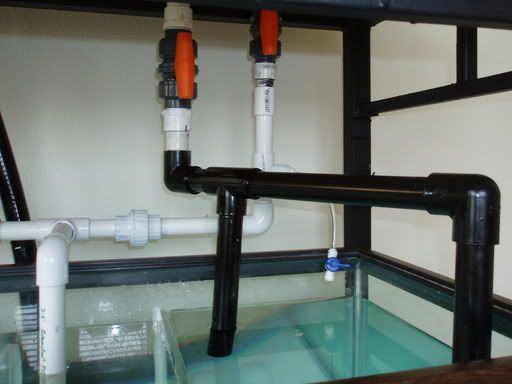
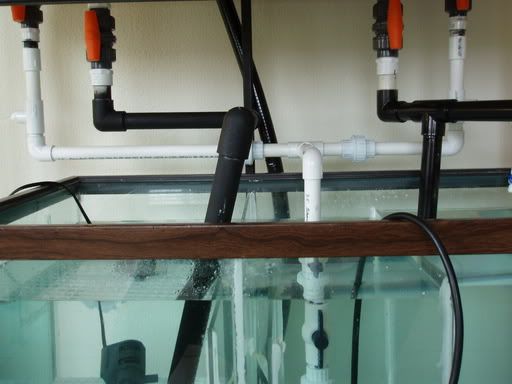
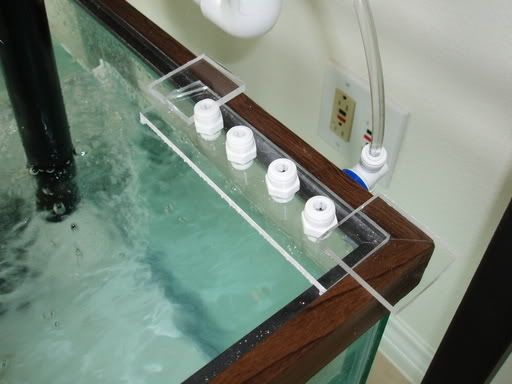
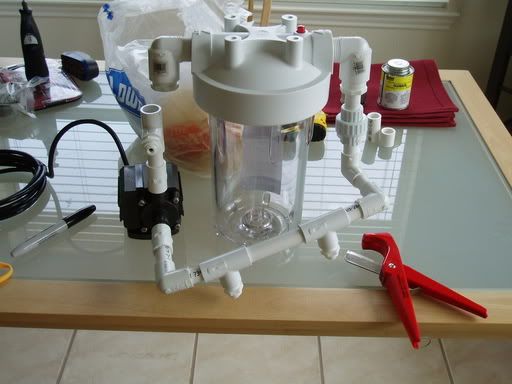
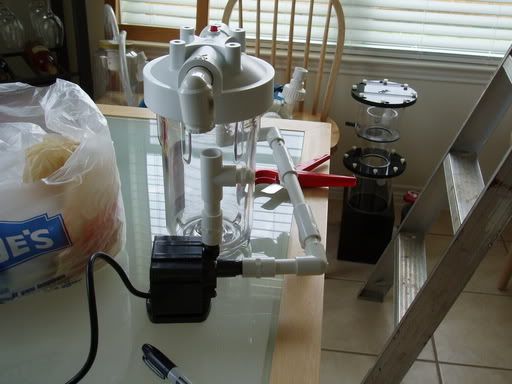
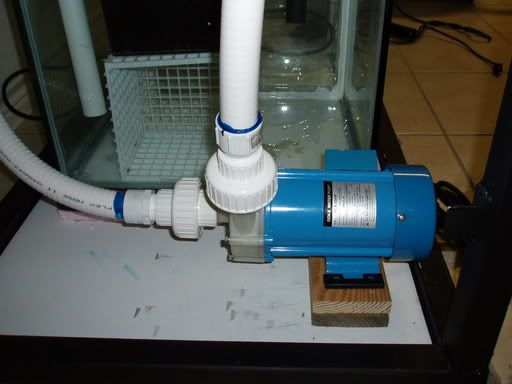
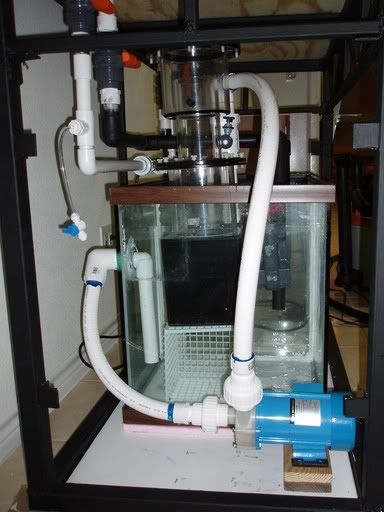
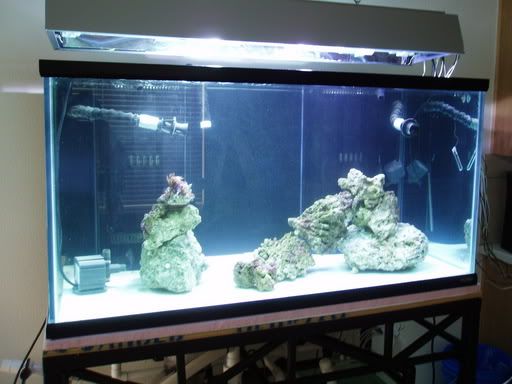
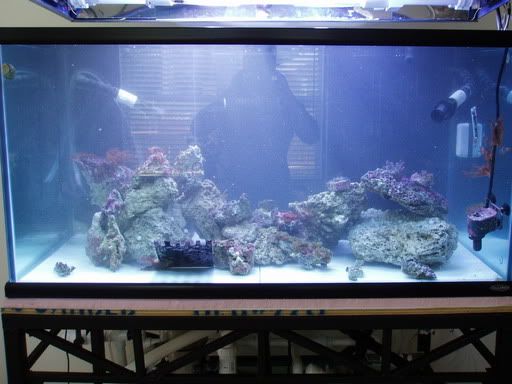
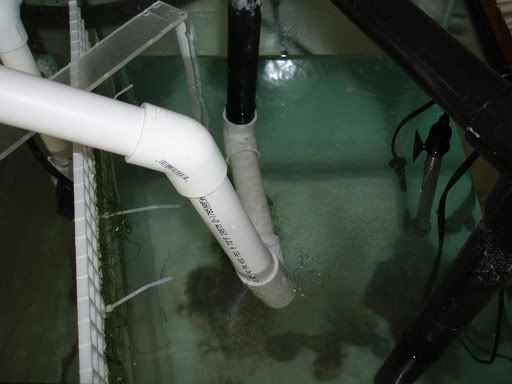
Sunday I finished the CL, which is a PCX-55 w/ 2 penductors. Let me tell you, those things are quite powerful. There is plenty of flow in the tank now. I took a picture right after it was turned on, and you can see the amount of crud it stirred up.

P7100050.jpg
alt="">

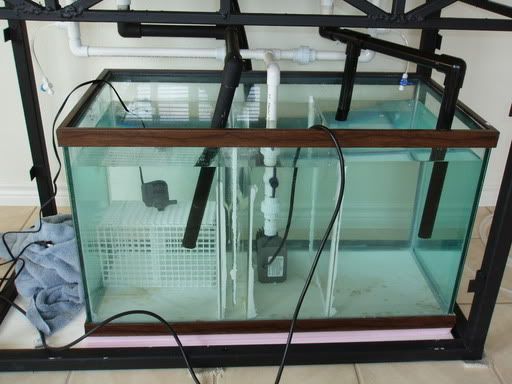
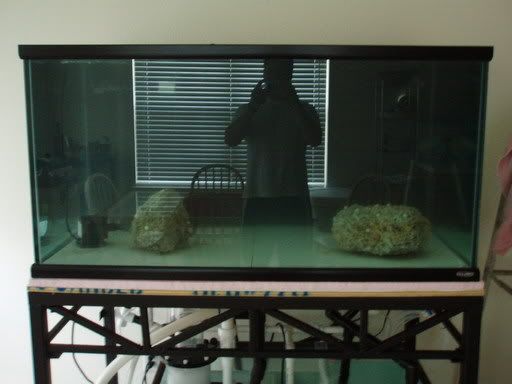
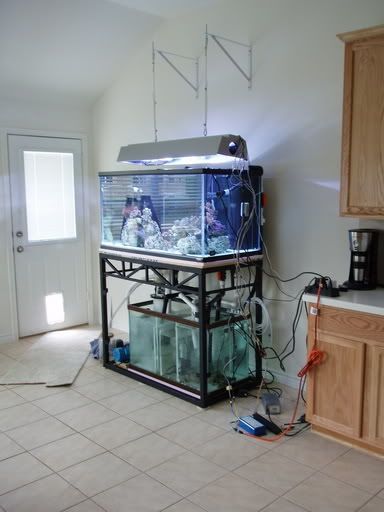
I'm still working on a full tank shot, since the lighting in the kitchen is a little bright. Here is one from the sink side of the kitchen after most everything was cleaned up.

P7100048.jpg
alt="">

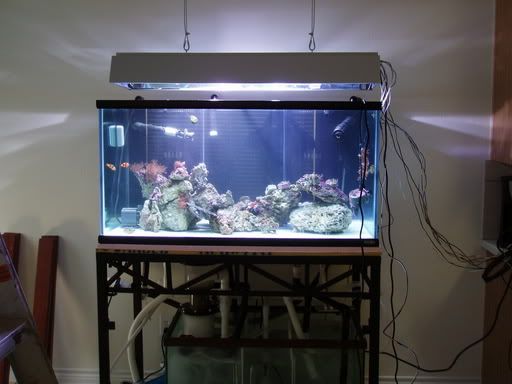
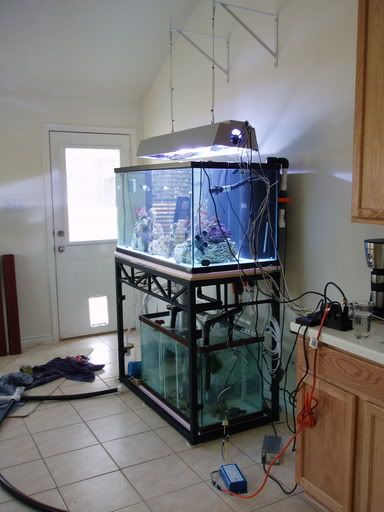
I still need to re-adjust the canopy to get it to hang better. In that last picture, you can see how it tilts slightly backwards. This is b/c all the cords are in the back of the canopy. I was thinking of adding some weights or something to the front of the canopy to pull it down. It may not be a big factor after the skirt is added though.

I did have one problem yesterday, after I was talking to my wife, I noticed that the bottom of one of the baffles had come loose, fuge side. As I as walking into the kitchen, the baffle broke free from the silicone, splashing a little h2o on the floor. Nothing major, but now I need to figure out if I need to drain the sump and fix it. I did learn one big lesson though, silicon DOES NOT stick to HDPE. Anyone have any ideas?

P7100053.jpg
alt="">

You can see where the baffle used to be (marked w/ white silicone). It came free of the glass and now has moved a couple of inches to the left, towards the return pump. Not much has been effected by it, although, it does mess up what I was going to do for my auto-top off.

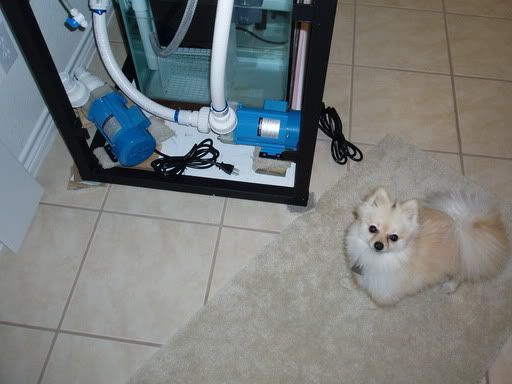
I'm also dealing w/ some heat issues, I guess those 2 PCX-55 pumps add a few degrees of heat to the tank. I have 2 diff thermometers running, but they don't agree. One says ~ 82 and the other is around ~84. I need to put a fan over the sump when I get that fixed.

Thanks for looking.
Chris
 
You are making good progress. Hiding all those wires will be tricky. You might consider putting the ballasts up on a shelf where those shelf brackets are, and running the wiring down behind one of the support cables. It might level out the light fixture. Your wife may have ideas how to hide things too.

Silicone and acrylic don't mix. I've said it plenty of times. If you had a glass baffle (1/4" thick polished glass), it would bond strongly. To fix this and use what you have, you'll have to dry everything, and resilicone it in position from both sides. It has to cure for 24 hours minimum before getting it wet again. You might even consider getting strips of glass and siliconing those next to each side of the baffle to act like a stop perhaps.
 
Top