Wier size

I'm building a new overflow and wiere, I don't like the one I made originally, it was somethign I kind of threw together from parts I had laying around. It works fine, but it looks horrible. I as thinking about making one like the one Meelve made on his D.I.Y. page, but the wier is too big to fit between the tank and the wall. so I was wondering if there is a claculation to determine the proper hight and width or does it not so much matter as long as it doesn't over fill and run out all over the floor. Also I was wondering if it's too far below the overflow if that will cause it to overfill faster than it can drain off. I did find out that if both the over flow and the wiere are the same dimensions that the amount of water in the overflow will be directly proportional to the amount of water in the wiere. Example would be if the overflow was 4x4x4 and the wiere is also 4x4x4 and there is 2 inches of water in the over flow at any given time then there will be 2 inches of water in the wiere at any given time. Would thi also be correct no matter the size of either?
 
Wow. I didn't even understand half of that.

Here's what you need to consider: How much surface area will be skimmed by the internal half of the wier. Don't make it too small, or you end up with any oil-patch on the surface.

The outer section's size doesn't have to be big, but it does have to #1) accommodate the bulkhead, and #2) maintain a water level so the siphon isn't broken.

If you can design a narrower one that accomplishes all of the above, you're good.
 
you realy didn't understand that? lol, sorry, sometimes I ramble and my thoughts come out in writing all jumbbled up.

Here's what happens on the one I threw together. both pieces inside and out are 4 deep x 4 wide x 4 long, so they are the ame size. now if I put it on the tank so that the inside part is almost totally submerged, with maybe a 1/4 imch above the water (there are teeth on the edge so water can strain through) then the outside piece will fill up to the exact same height, no matter the drain size. So I was asking about the sizes, because I was conserened that if I made the outside piece to small it wuld over flow, like the one on the tank now. The water level of the outside piece is proportional to the water level of the inside piece. does that help explain it any better.

but anyway thanks. I started one last night and changed a few of the outside box dimensions to suit my needs. hopefully it can handle the water coming in.
 
The outside half has a drain, so it doesn't matter. It won't fill up faster than what is going over the wall, unless it is the size of cassette case. :lol:

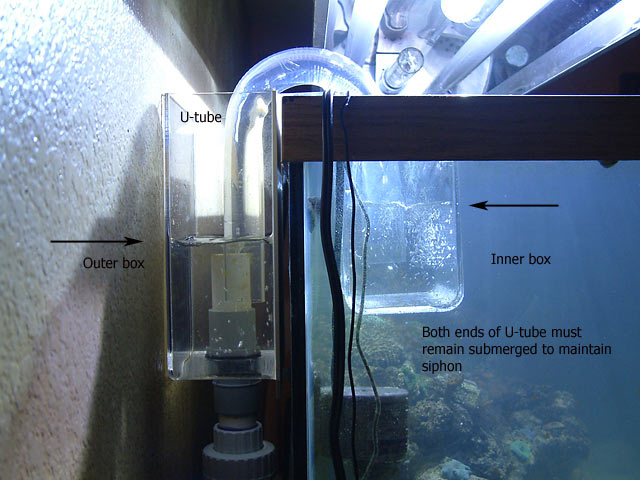
Here's a picture of a common HOB kind with some descriptions:
overflow_box.jpg
alt="">
 
LOL, No I'm telling you. IF both parts are the same size, they will both fill with equal amounts of water. Anyway, It doesn't matter Last night and tonight I bult that overflow box from your website. Have it clamped and drying right now. Need to router the side pieces of Acrylic to match the shape of the overflow, then test it out. Hopefully it won't leak. Preatty easy to build I was kind of shocked how easy it was.
 
Equally full shouldn't matter, as there is a drain in the outer box, correct? It just needs to be tall enough to not overflow and leak.

Looking forward to hearing how yours comes out.
 
ok, ya that's what I was wanting to know. because that's where I think I screwed up on the one I threw together. both inside and out side were/are the same size and if you submerge the inside part fully under water the outside one would overflow, it made for a real hassle trying to find a happy medium of flow into the sump and flow out of the sump (matching flow).

I'll know today if it's sealed or not. I have my fingers crossed.

oh I know what else I wanted to ask. has to do with the weldon. on the seams to be sealed is it better to have the acrylic smooth or do you want the edges to be alittle scuffed(with fine sandpaper) to give that extra tiny bit of surface area? I scuffed the edges aster planing them and it looks like it may have worked out fine, the bonding edges look smooth and glassy now.
 
Smooth and glossy is ideal. You don't need nor want to rough up the edges, because you are trying to 'weld' or melt the two pieces into one piece.
 
Roger that. I started a new sump and got a plexiglass cutter for straight edges. Works great cuts right through in a couple of passes and gives a decent edge. I took the pieces and plained the edges. Then used my propaine torch to reglaze the edges so they were smooth again. oh the wier as ugly as it is worked great. It's ugly but for a first project I think it turned out not too bad.
 
Don't torch edges you plan to glue together. You can flame polish edges (tops of baffles, for example) without concern, but never a joint or future joint.
 
oh oops. I was thinking just a fast pass would be ok. Does it harden the edge or somthing like that. Man I didn't even think of that. Was fast like pass your finger through a flame fast, just enough. Ok then that leaves me with a new question. How to you get the edges you just cut back to glass smooth.
 
When I run the edges I'm going to glue, they are pushed carefully across a jointer. Before I had that, I held a razor blade (from a utility knife) in my fingers, and dragged it across the edge to keep it perpendicular.

Another method that works but takes time is to clamp the acrylic to a board, leaving a tiny bit of the edge exposed, hanging over the lip of the board. Using a laminate trimming bit, route off that excess to get a clean edge, ready to glue.

I wouldn't use what you hit with the flame. I don't know what would happen; I wouldn't risk it.
 
I saw laminating bits for my dremal (I have a dremal that has a router and planer attachments) Router, but I wasn't sure if that was what they were for. I'll have to go get one from Lowes and see if it works, because the planer no matter how fast or slow I go leaves a slight roughness to the edges. When you use the razor blade you drag it along the edge not push it?

I'll have to try the different methodes you described and try them out.

Sorry to be a pain, but also I was wondering about the wrinkle that is left on each edge where a bend is made. How do you get rid of it or avoid it? I tried everything I could think of to avoid the wrinkles but nothing worked. I also thought that maybe I could plane the edges, but that took alot of meat off to get down far enough.

I seemed to have developed a small air leak at one tiny spot. Not sure how it happened, eveything looked nice and sealed. Anyway I need to take it off and put the old one back on and reseal this one spot. It was fine yesterday no air leaks, it just developed today.

Ya know what else I was wondering about. How come your sucks massive amounts of water? No matter what I did(before the air leak) I couldn't get all the bubbles out and it's not moving more than about 50 GPH. I have the valve for the part of the pump return that feeds the excess water back to the refuge wide open almost. There's barely any water running back to the tank if I close it the tank will over flow or the return part of the refugium will drain empty. It's just not drawing water at what I would thing would be a full rate. It's the same size and all the parts are the same size except the outside cup is a half inch narrower than the one you made. PLUS I only have a 1/2 inch drain so according to that I saw in your video (being you had 300 GPH on a 1 inch drain I should have plenty of water draining down the pipe to the refuge, yet I have barely a 1/2 inch of water in the bottom and hardly any water running down the pipe. any ideas?

Here's a pic of it .
 
It looks really good. The wrinkle? I don't know where you mean. Or do you mean the slight bulge that occurs at the end where the bend occurred?

I pull the razor blade toward me, pass after pass, keeping it perpendicular to the material. I just want to scrape it smooth, but not glassy smooth. Just remove all the rough burrs.

The 1/2" drain will not drain 50% less than a 1" drain. It is significantly slower. A 1" drain has .78" surface area, compared to a 1/2" drain that has a .19" surface area. That is a huge difference.

If you open the valve fully, what happens specifically? Does the outer box fill up more and more?

Did you insert some airline tubing into the draining bulkhead so it can drain quietly and efficiently?
 
@Marc wrote:
It looks really good. The wrinkle? I don't know where you mean. Or do you mean the slight bulge that occurs at the end where the bend occurred? I pull the razor blade toward me said:
Ya that's kind of what I figured anyway. pushing it didn't make sense to begin with it would get cought and make gouges. I did find out also that like you said it doesn't get glassy smooth, but it does smooth it out and you can fine tune any irregularities, like a high spot. The razor worked good and was easy and fast to do. I think I'm going to bust out my mill and make an alluminum mount like a small table to mount the dremal planer in so I have more flat surface area to work with like a bench.

Ya I was talking about the buldge. How did you get rid of it or didn't you and just used the weldon 16 to help fill it in alittle?

I think I explained the whole draining thing wrong. I'm not realy sure how to explain it. I meant more the wiere itself not so much the actual draining of the wier. I realize that the 1/2inch is much smaller than the 1 inch. Let me put it like this. If I actually had a 1 inch drain it would like no water is going through the pipe, because the amount of water coming through the wier does not seem to be keeping up with the water being drained. I'm not sure if that makes any sense. My wife wants to come to the meeting the 13th, maybe I could explain it in person alittle better if your there.

I have a piece of air line going to the top of the wier for priming the wier, but nothing going to the bulk head. Where would I put a piece of air line in the bulkhead?

Uhm, if I open the valve all the way? then no water goes back up to the tank because it's the bypass valve for the extra water the pump pumps it goes into the refugium and the refugium over flows, lol.

On a side note I did discover that about a gallon a day evaporates from the tank, lol.
 
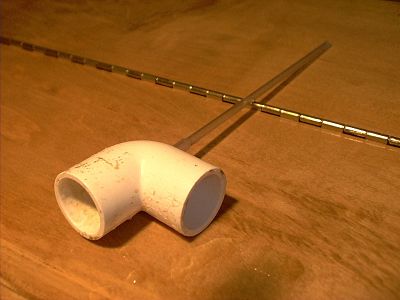
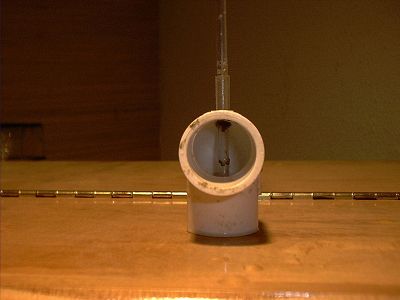
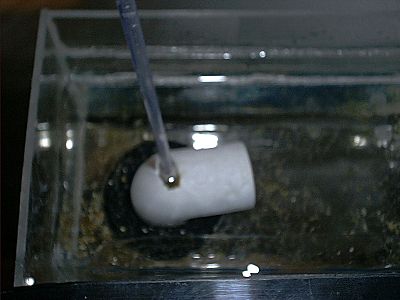
I made a silencer for my 1" drain like this:

90a.jpg
alt="">

90b.jpg
alt="">

90c.jpg
alt="">

It fit right into the bulkhead, and the rigid tubing kept it quiet while letting air down the drain.

weiriif.jpg
alt="">

The tubing you have coming out of the apex of the wier could be connected to an AquaLifter pump, because that constantly sucks out air or water, and pumps it back into the tank. You want one part of the wier to have an apex (high spot) for the air to gather, and that is the spot where it should exit.

When I said open the valve fully, I guess I meant close the valve fully. What happens in the display? Does the tank overflow, or does the box keep up?

I like the job you did on the teeth.

I just scraped and sanded the bulge down as much as I could so it would be a smooth fit. #16 may even be needed to act as a filler, depending on how much you scrape off.
 
ok that's cool I'll have to get a 90 and some rigid tubing to make a silencer.

If I close it fully the tank over flow and the return side of the sump will drain down till the pump is sucking air and it will stay that way till I open the valve some to let the extra run off back into the sump.
 
That means your drain isn't large enough, and/or your return section is too small.

If the drain was larger, more water could exit the bulkhead and head down to the sump, which would flow more quickly and refill the return section adequately. It is a balancing act.

Have you actually had the tank overflow, or did it just get close and freak you out? If the latter, that's a normal reaction. Adding air to the drain line, adding more water to the return section, and making sure the plumbing entering the sump is only submerged .5" into the water - that should be all it takes to get it working properly.
 
Ok. I got it. Here's what I did. I added the water that would normaly need to be replenished everyday, about a gallon. THEN I topped the tank off with Saltwater right up to the brim, cranked up the pump and blamo it keeps up perfectly fine. It's right in tune pumping and draining at the same rate. Just needed a tad bit more water. Now I hope I never have to stick my hand in the tank, LMAO :roll: .

Thank you very much for your help and patience. Oh and for your website, Love it. I love D.I.Y. projects and my new Acrylic hobby is not only enjoyable but has practical uses in my various fresh and salt water setups. Matter of fact I'm getting ready to build an acrylic water fall, wet dry, Bog filter for Our pond and a tank with about 50 to 60 seperate sections for all of our quickly growing Beta Babbies. Anyone want to get a beta baby, LOL :roll: Oh did I say I realy love your website, great projects, lol. Thanks again.
 
Top