DaveJ's 300G Build (Build has officially begun - In Process)

Some new additions :)

DJ's Orange Eye Dinosaur Chalice

P1010122.jpg
alt="">

DJ's Darth Maul Variation Chalice

P1010104.jpg
alt="">

DJ's Grape Ape Watermelon Chalice

P1010105.jpg
alt="">

DJ's Orange Fizzy Lifter Chalice

P1010106.jpg
alt="">
 
Some updates for today....

Here is a visual of how I do my water changes on my system. I simply attach a hose to the spigot on the sump and then drain it out the front door. I then take the end outside, hook it up to the output on the tanks in the garage and pump new water into the sump. That will be plumbed this weekend, so all I will need to do after that is done is turn a valve and fill it up that way.

IMG_0806.jpg
alt="">

Frank and Rick stopped by again last night and ripped yet another tank out :) This time my 65G Frag Tank went into the garage for a temporary stay. Plan is to replumb everything this weekend and reconnect it. That room looks much bigger now!!!

IMG_0810.jpg
alt="">
 
You're not worried about siphoning out the corners of the display for buildup? You think just draining the sump is enough?
 
@ReefGod wrote:
You're not worried about siphoning out the corners of the display for buildup? You think just draining the sump is enough? said:
Most of the crud collects between the rock mounds in that channel between them... I just hit that with a hose and 5 gallon bucket. Once I get all the frags back in the 65, I'll use a MJ to blow things out from under the rocks/caves and let the flow do the rest then just focus on that central collection point.

The edges of the starboard get cleaned up by the flow... I get most of it just by cleaning the glass with a magnet.

For 50G of change though, nothing beats this method. That drain level is exactly 50 or so gallons, a perfect change amount for 450G of system.
 
Some additional Eye Candy.....

Tyree LE Babies Breath Favia

IMG_0811.jpg
alt="">

UFO Micro 1

IMG_0814.jpg
alt="">

UFO Micro 2

IMG_0815.jpg
alt="">

Can't recall the name Micro :)

IMG_0816.jpg
alt="">

And a much better photo of the Tyree Pastel Peace Coral

IMG_0813.jpg
alt="">
 
Some very nice corals there!

And how often are you doing the water changes - weekly/bimonthly?


Time for a FTS - no?! :)
 
Made some big progress today courtesy of ERIC69. He was kind enough to offer up his services for plumbing and we got the vast majority of the complex plumbing completed today.

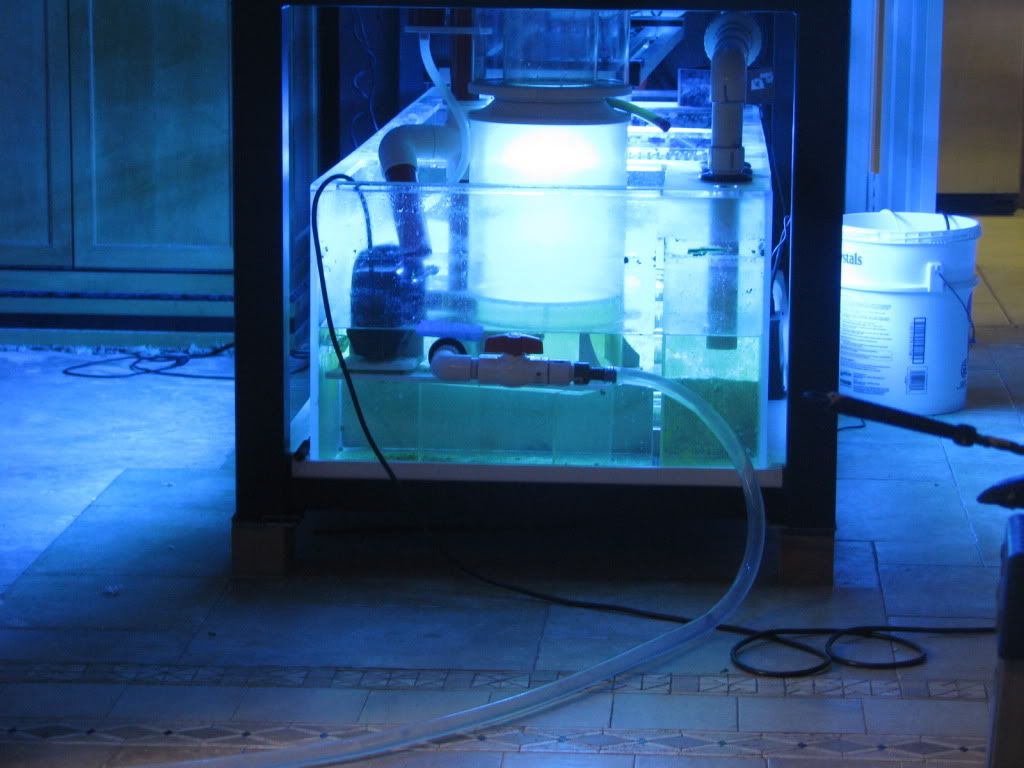
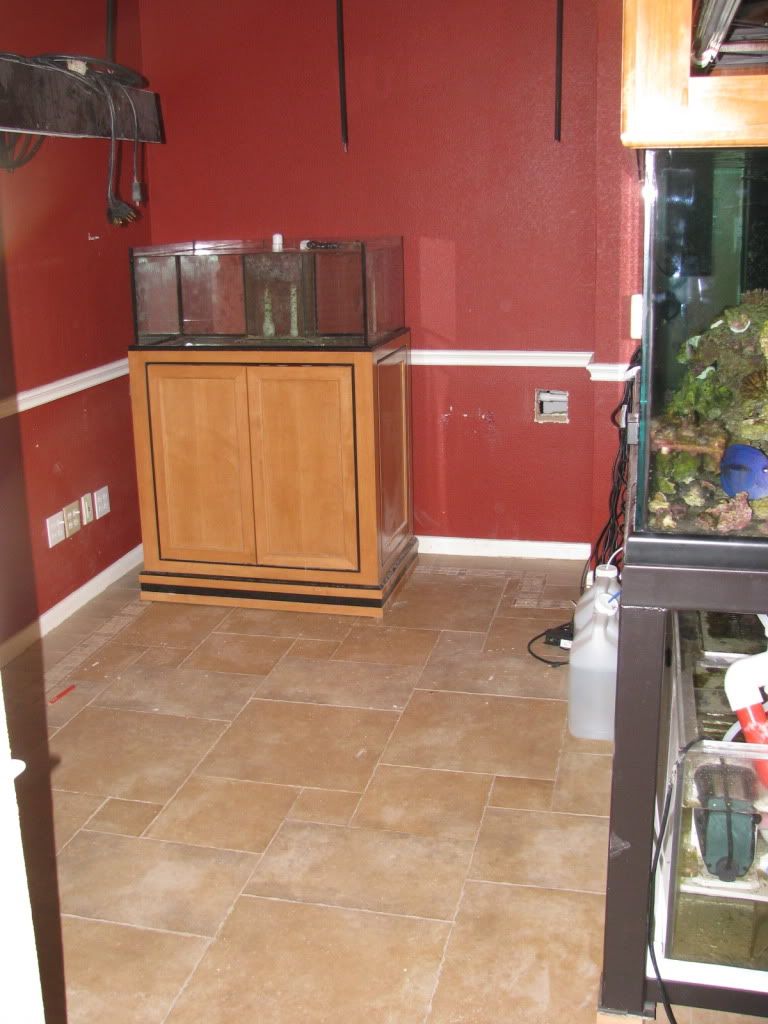
Today's plumbing included running the return to the remote equipment. This includes the frag tank (65G) that we re-plumbed now that the floor is finished. It also included the equipment area in the utility room for the chiller, the refuge and the media reactor setup.

Here is the drain line bringing all the plumbing back from the remote equipment into the sump.

IMG_0829.jpg
alt="">

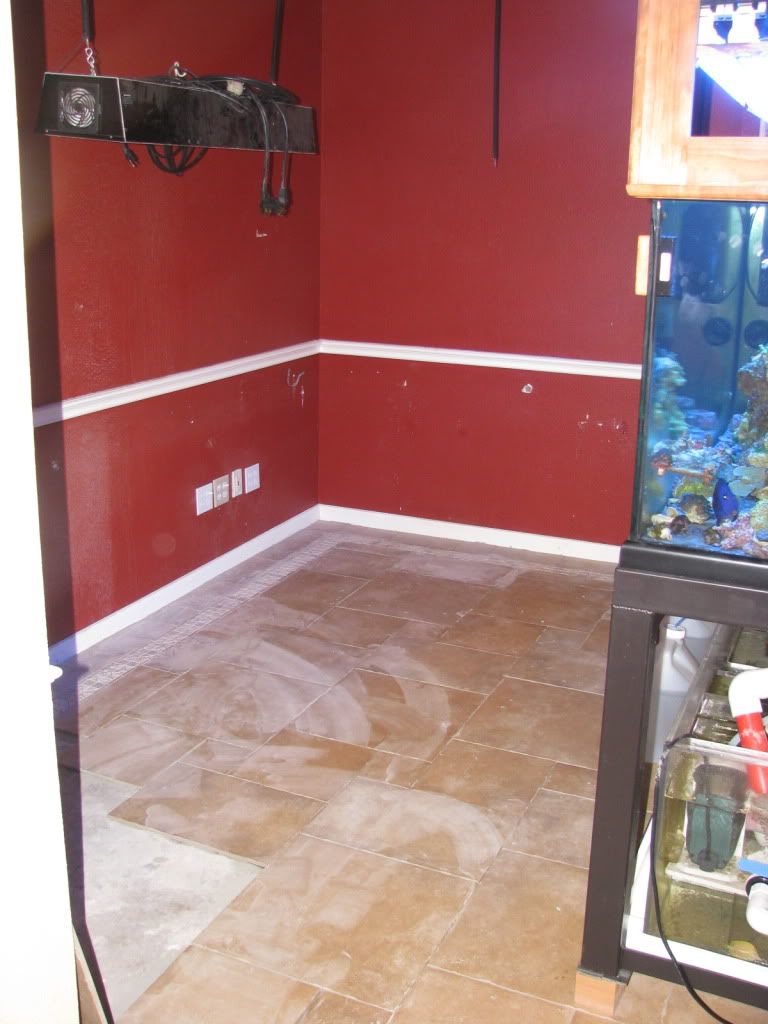
Eric had a good suggestion of running the lines through the wall behind the 300 stand into the pantry, then into the utility room. We then came back through the wall behind the frag tank itself. This eliminated any visible plumbing into the room itself. We will patch the old access hole and texture/paint it so the wall looks as good as new next time around.

Return/Drain coming going into the Pantry.

IMG_0831.jpg
alt="">

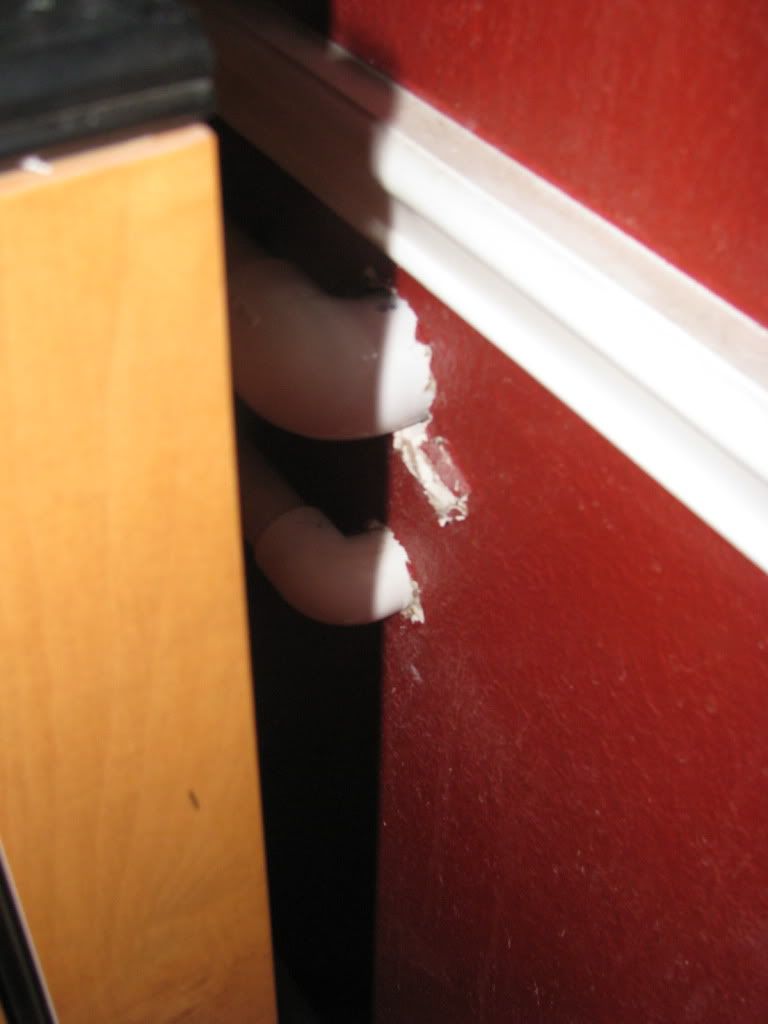
Drain and Return for the Frag Tank hidden by the stand/tank itself.

IMG_0832.jpg
alt="">

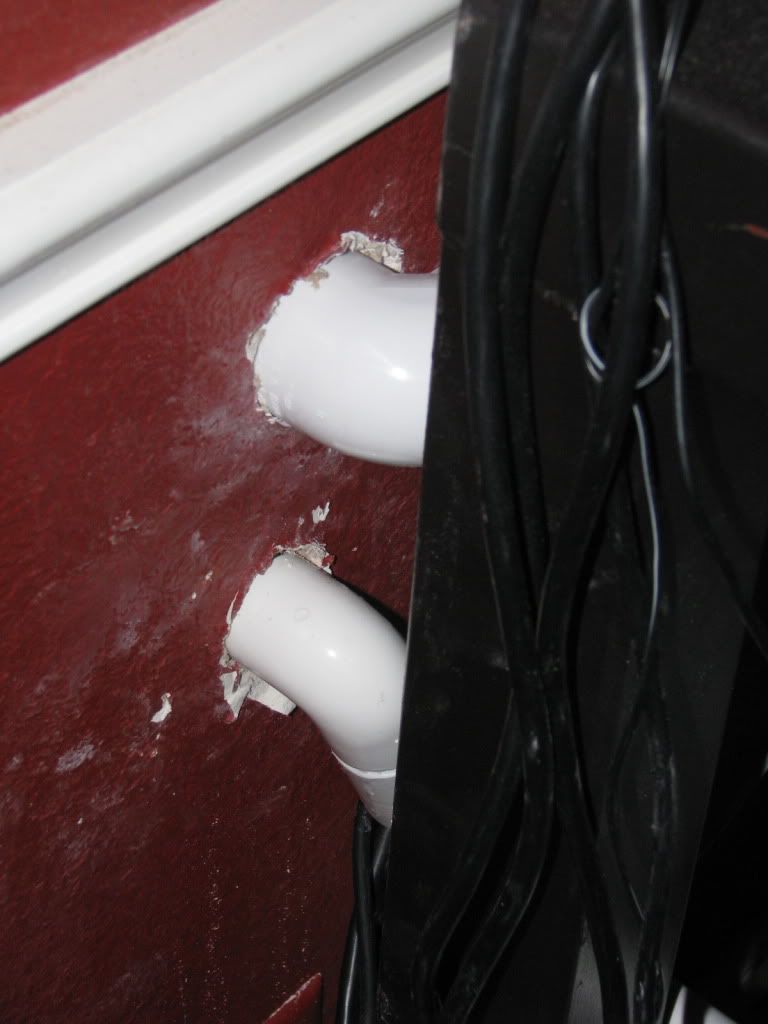
Look Ma! No more PVC showing.... hole will be fixed.

IMG_0833.jpg
alt="">

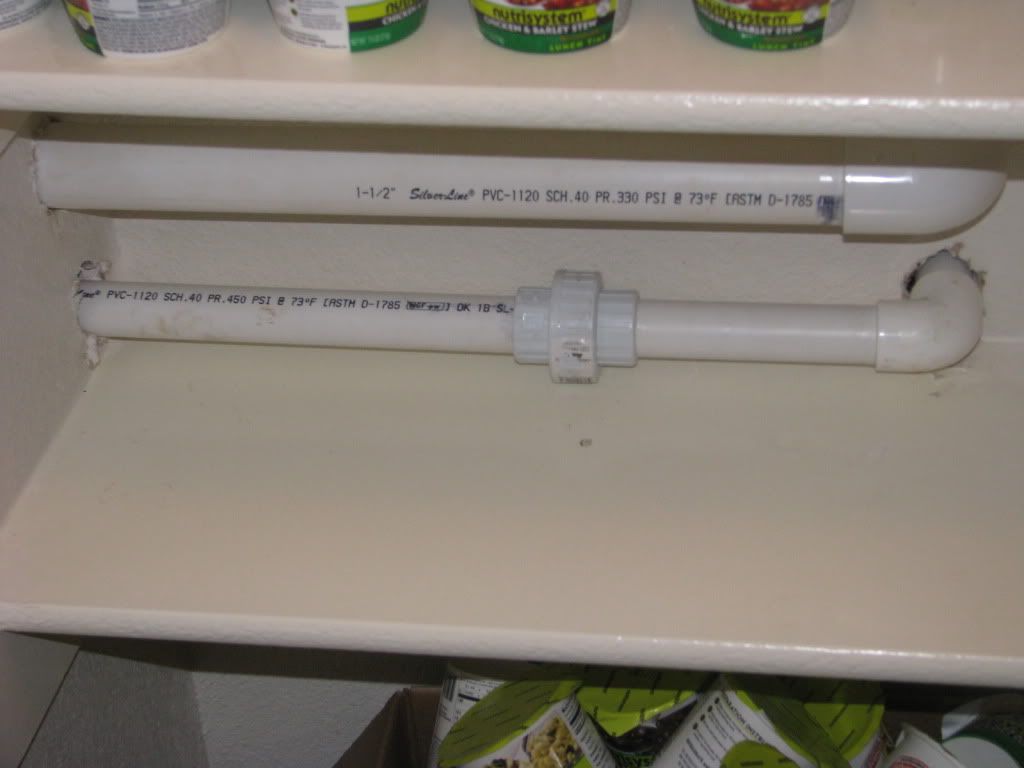
Shelf in the Pantry... eaten up by the plumbing. But a single guy doesn't need pantry space :)

IMG_0834.jpg
alt="">

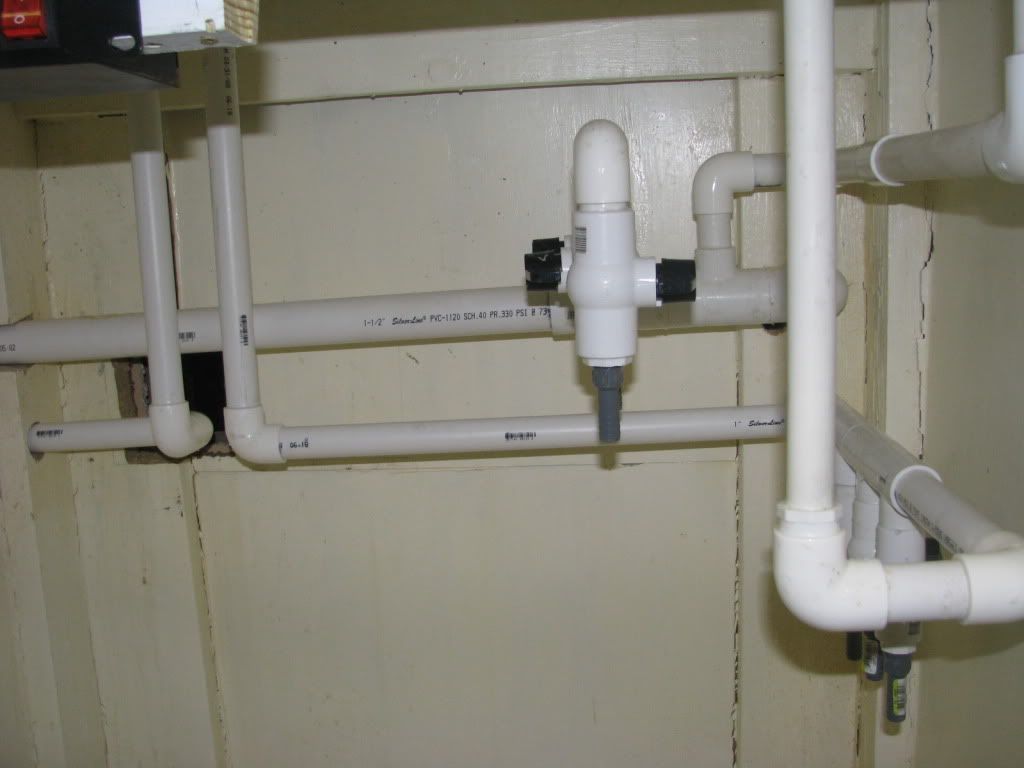
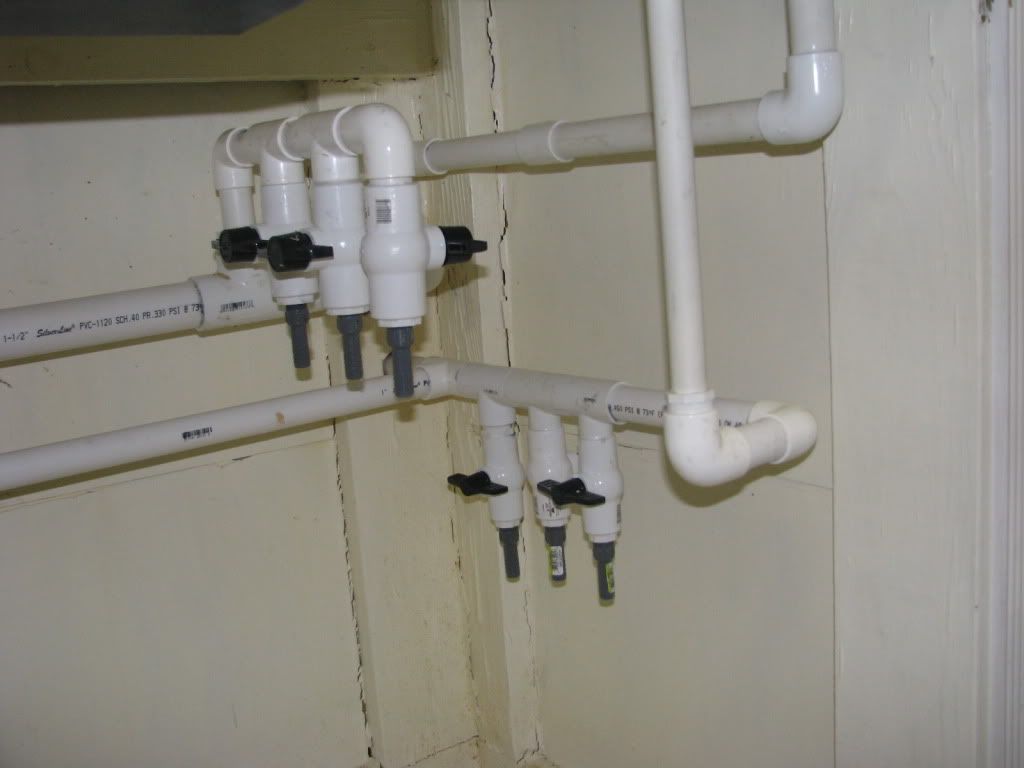
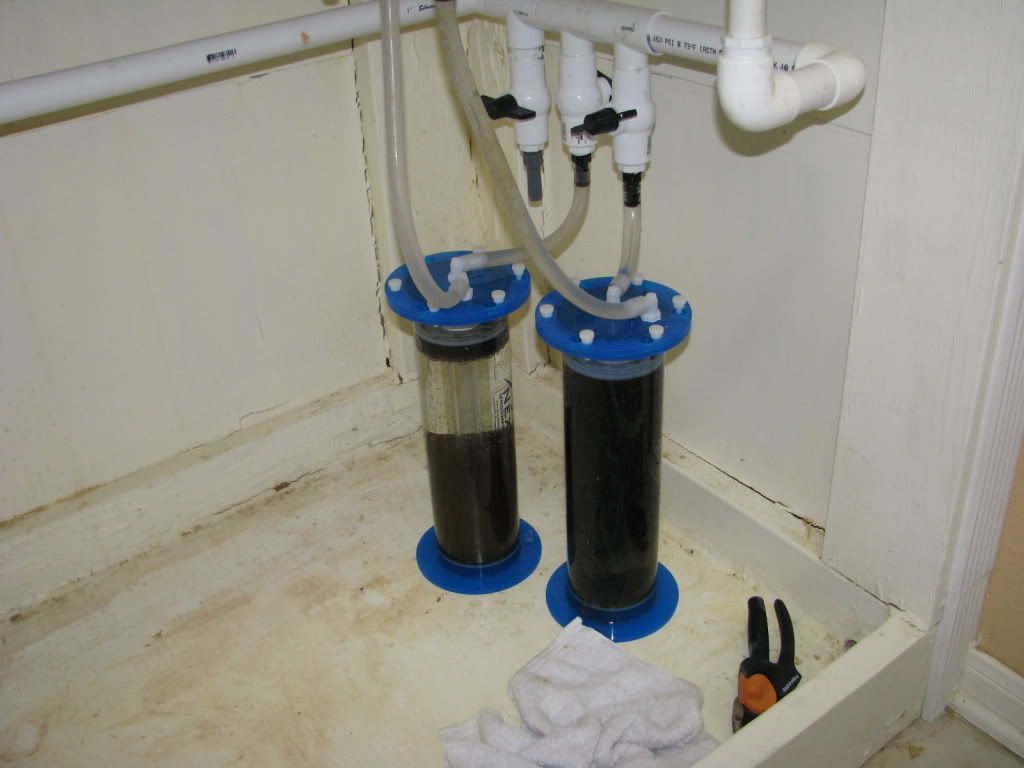
Here is the new plumbing where the old sump was. These lines include the return feed and the drain, along with the inlets/outlets for all the media reactors. Each of these has valves to shut off the reactors for maintenance. The trick on this setup was the drain line. Because the drain is gravity drain, the flow will push the water through the reactors and up into the drain above. Due to the 90 use to connect it to the drain itself, when the flow is shut off with the valves on the right, the drain will not backflow. We tested this out by opening the drains and sure enough, not a drop despite the entire thing running.

IMG_0835.jpg
alt="">

IMG_0836.jpg
alt="">

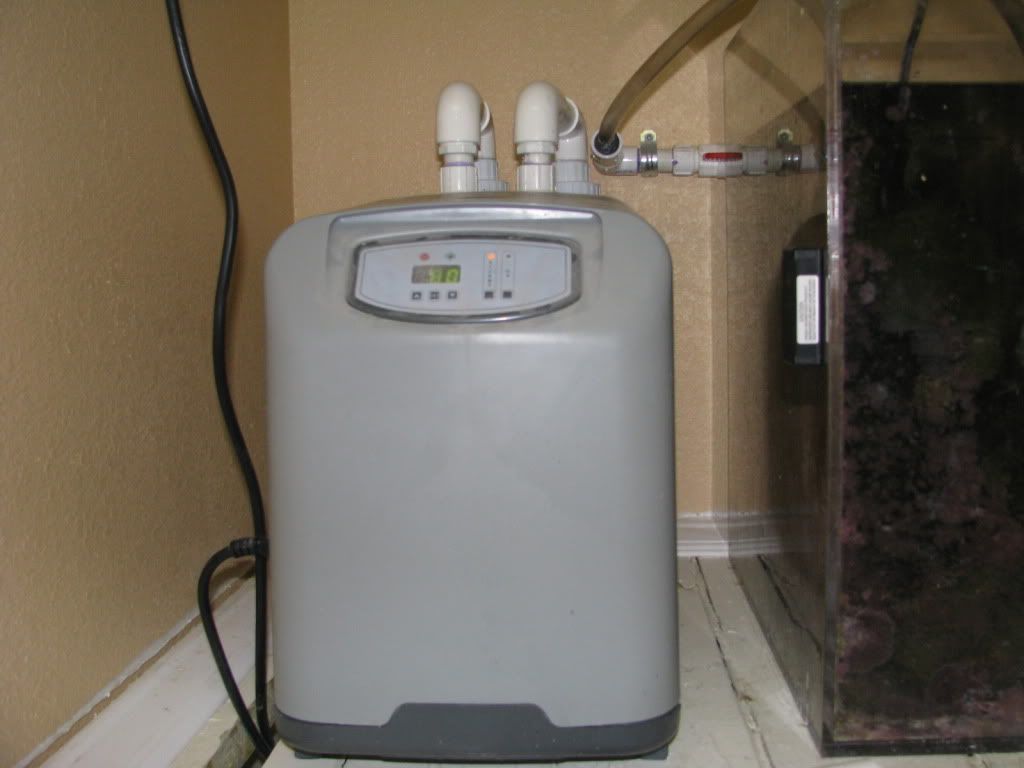
Here is the chiller. Given the temp I keep the house, Frank and I figured the existing chiller will be enough to keep the system in check. I will monitor it over the summer, but this chiller didn't run much at all before so I don't think it will have a problem even though its technically a size too small. Already it took the entire system down 2 degrees after having the house open and warmer add-on water put into the system.

IMG_0837.jpg
alt="">

Another feature of the new plumbing is going to be inline probes. Using the T's you see here, I will use compression fittings to insert the pH and ORP probe into the plumbing line. This will give a better and more accurate reading real time and eliminate the probes from the sump entirely. It will be much cleaner. The fittings are on order, so they will be installed once they get here, for now we just plugged the openings with screw plugs.

IMG_0830.jpg
alt="">

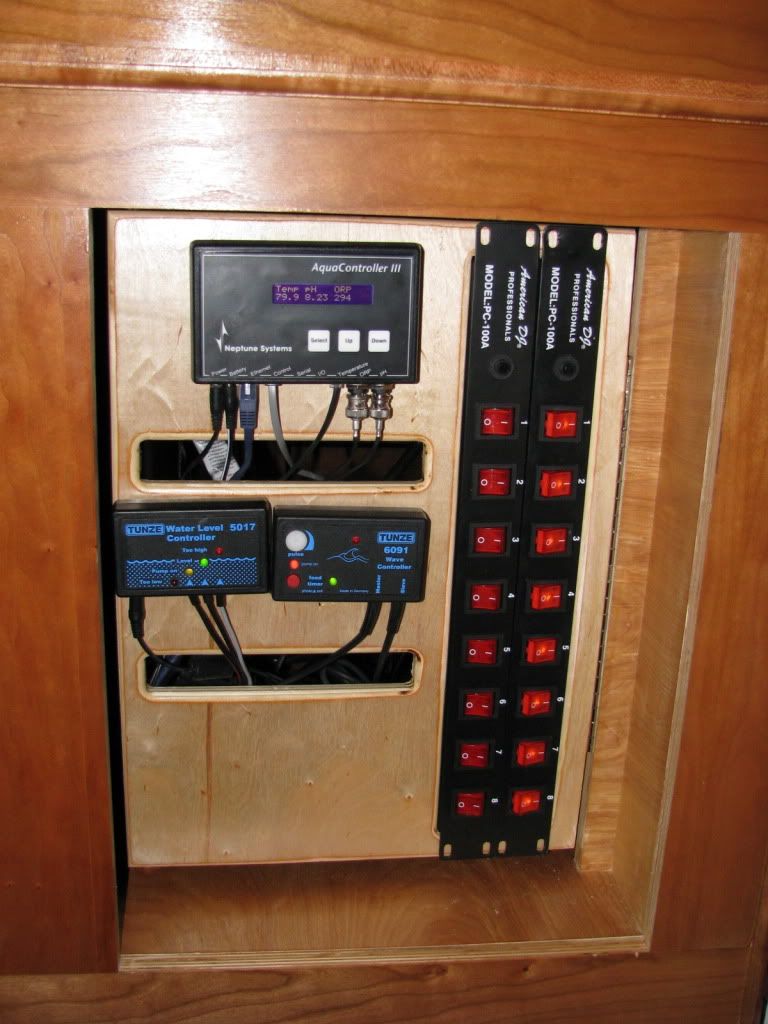
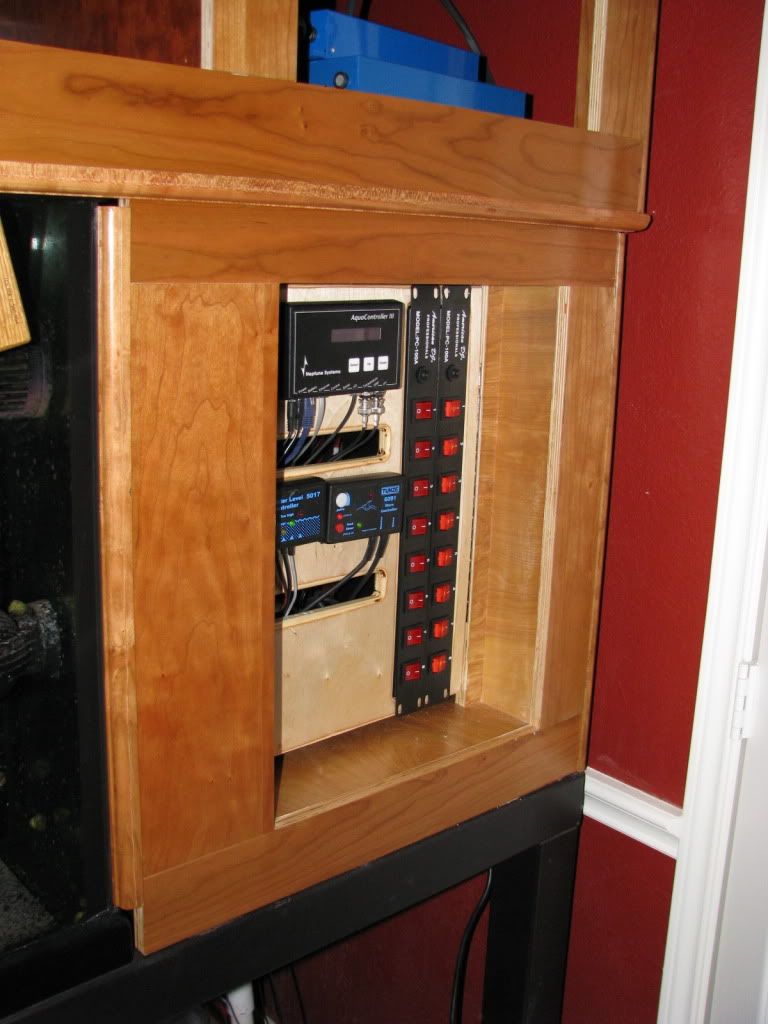
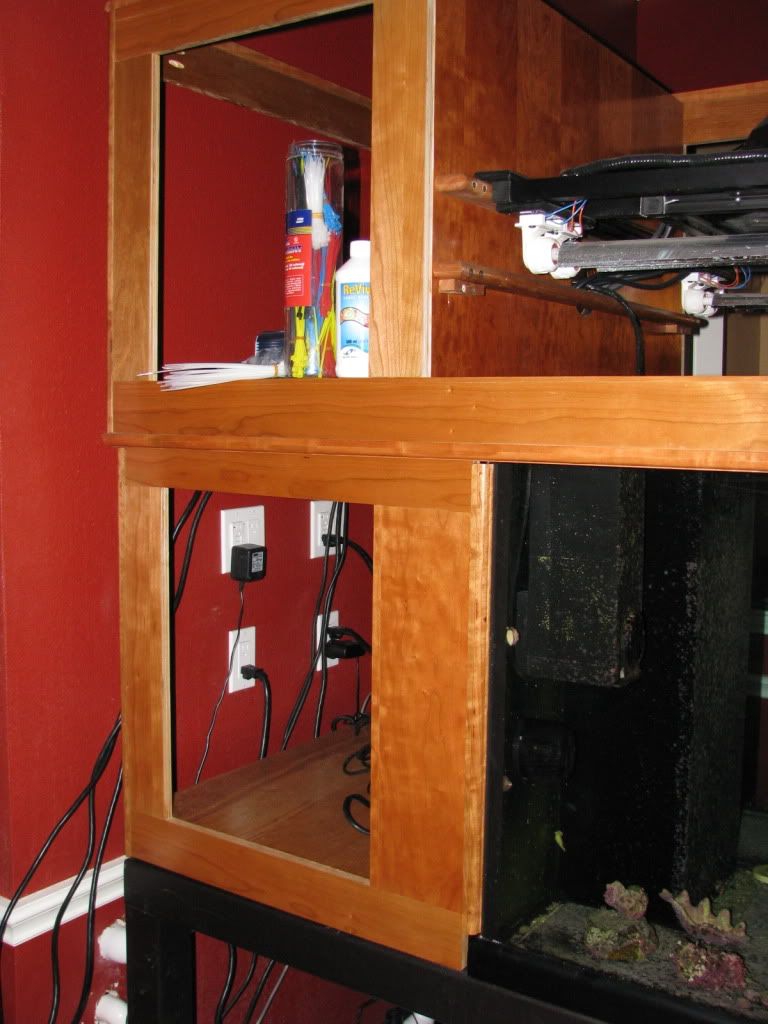
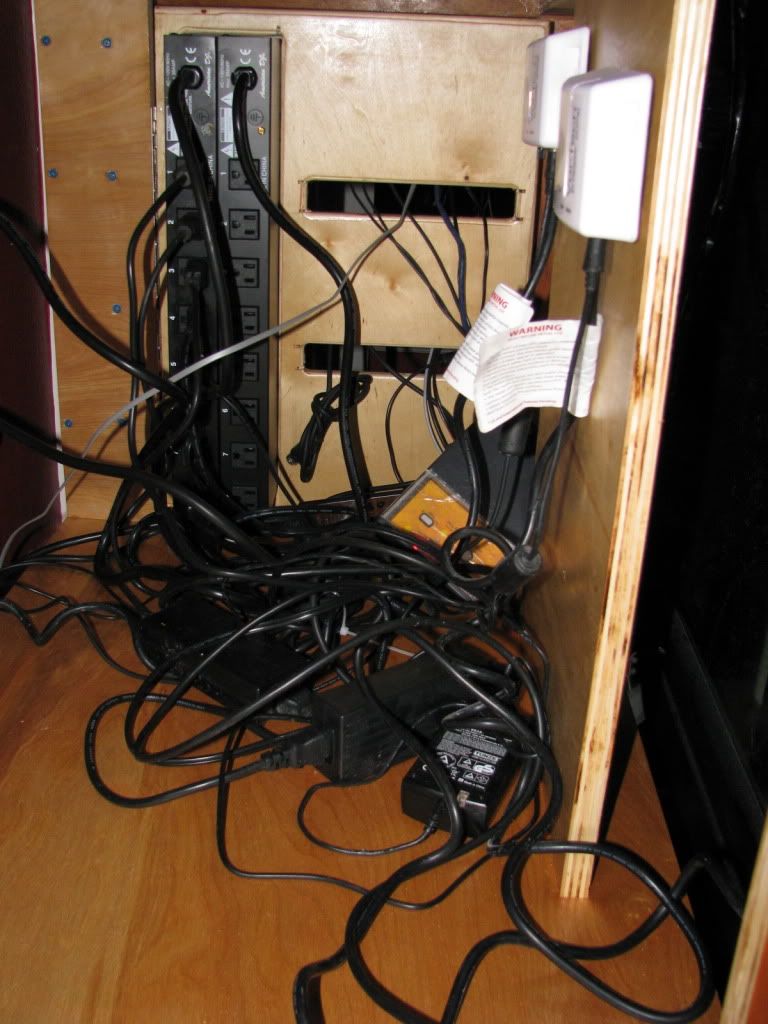
I should be getting the side cabinet for the tank in tomorrow or Monday. Then all those cords and wires will be cleaned up and I can get all the top off and dosing lines run. I still need to run those through the wall, but I may just end up following the same setup as we did for the plumbing instead of going through that hole in the wall or putting a new one in.

Wait until you see the cabinet :) Its got some really nice little features and surprises in store.....
 
Dave,

About the probes being inline....usually they need to be placed in gentle flow to prevent erratic reading's. Also if you have th ACIII, the temp probe should not be within 6" of the other probes. If you have the ACIII Pro the temp probe is used as a ground reference for the other probes and most be within 6" of the remaining probe's. I'm not sure of the jr but I'm thinking it follows the ACIII rules. Something to think about. :D

Cheers,
 
@bimmerzs wrote:
Temp will remain in the Sump.. that won't fit into the probe holders and I have the ACIII, so it shouldn't matter where it goes.

The flow through that is about 1000gph so we will see how it does. Easy to plug if there is an issue. Thanks though for the info, I will keep an eye on it.
 
Well there was a bit of progress made over the weekend. Hank finished up the shell for the side cabinet. This sits against the wall and butts up to the tank itself. The design wad done so it slipped in under the canopy and the bottom skirt will overlap it on the bottom. Again, the doors are not completed yet, but this is the main structure and the neat part, the control panel. The control panel is a door with slits/slats cut into it to provide mounting for various controllers and 2 DJ strips. I got most of the wiring transferred today, but it still needs some clean-up. I wanted to get everything in there and its not as a tangled mess as it seems in the photo, most of that stuff is just laying on top of each other. I will zip-tie much of it off tomorrow when I put the DC8's and DC4 up in there.

Control Panel from the front...

IMG_0844.jpg
alt="">

From the side (see how it butts up to the tank)

IMG_0845.jpg
alt="">

Backside next to the frag tank..

IMG_0846.jpg
alt="">

And the mess of cords that will be neatly wrapped up. You can also see the inside panel that I velcro mounted the vortec controllers to. The spaces on either side of that panel allow access to the vortecs, tunze and wavebox etc right on the glass.

IMG_0847.jpg
alt="">
 
I also need to update the Stocking List....

1 5" Dejardini Sailfin
1 7" Purple Tang
1 2" Sri Lankin Fairy Wrasse
1 3" CBB Butterfly
1 4" Lawnmower Blenny
1 4" Coral Beauty
1 5" Pink Spot Watchman Goby
1 Pair of mated ORA Black and White Clowns
1 5" Blue Throat Trigger
1 3" Male Lyretail Anthias
6 2" Female Lyretail Anthias
1 3" Male McCoskers Wrasse

The Sri Lankin Fairy Wrasse and the McCoskers don't really get along too well, as the McCoskers hides most of the time, but he seems to be doing fine and eating. He's been making appearances more the last few days since I added the Anthias to the tank.

What I didn't count on was after adding the Anthias, my Blue Throat was chasing them around. Nothing serious, just bursts at them but he did butt into the glass when one juked and made a nice thunk/clink sound. I guess his teeth hit the glass :) They seemed to have worked it out now though as the Anthias swim all around and the Trigger doesn't even look at them anymore.

I also added some corals to the tank as a result of Franks sale this weekend. I'll post some photos later, but I added a very nice Lobo and a very colorful Tracphyillia to the tank as well as an unknown frag thats been sitting in the back tank for ages. It was a 'break-off' from one of the wild colonies he got many moons ago. Its a cool blue/green....

I've added quite a few SPS as well from MBZ's tank and I'll get photos of those they included the Blue-tipped Prostrata, Ultimatefrags Millipora, Tri-color Millipora and the Pink Champagne. I also managed to pickup a couple of frags from RC which included Rommels Rainbow Acro, an Oregon Blue Tort and a ATL's Strawberry Prostrata.
 
I love the new woodwork for the control area. That looks great and keeps the wiring out of sight.
 
@Marc wrote:
I love the new woodwork for the control area. That looks great and keeps the wiring out of sight. said:
Yep that was the idea. I don't mind wires, but once everything is enclosed in the skirt, I'd like them all out of site and well above apart from any water.

I was going to run the LMIII in there too, but I am debating that as that would introduce possible fluid in that area even though RO/DI line is pretty sturdy. I may just do it on the back side instead. Those lines will be run through the wall as well as the top off, so I can put the controller anywhere within 50ft as the LMIII pumps go up to 50ft... the top off has a working distance of 12ft, so that is my limiting factor.

Once we get all the final plumbing done, I'll need to extend the Osmolator wiring to get everything where I need it. Luckily none of the wiring is hard lined in, at least the pump wiring that is. I'll need to send Roger a note to find out if there are any distance issues on that sensor wiring though to make sure.
 
Here are some additional shots of some new corals and a few FTS's....

New Lobo via Franks

IMG_0848.jpg
alt="">

New Trac via Franks

IMG_0854.jpg
alt="">

New Acro via Franks

IMG_0852.jpg
alt="">

FTS from the side

IMG_0855.jpg
alt="">

FTS from the front/left looking to the back

IMG_0856.jpg
alt="">

FTS from the front/right looking to the back

IMG_0857.jpg
alt="">
 
Got my media reactors up.. carbon had been running awhile, but in the sump. I hooked them up the manifold in the utility room tonight. Unfortunately I had to redo some of the plumbing... I made a mistake when picking out the barb fittings and I wanted 1/2 ID and ended up with 5/8 ID. A quick trip to Lowes and some new barb inserts, a bit of teflon tape and a pair of pliers and were in business.

This is running about 6 cups or so of Carbon and 3 cups of GFO pellets. I may switch to the high capacity when I run out, which won't be for awhile.

For those doing the math on their own GFO from BRS, they recommend 2 grams per gallon. I estimate 400g on the low side for water volume, so that equated to 800g, which converts to 5g per teaspoon which converts into 160 teaspoons or 3.333 cups :) So I measured out 3 cups, again going to the low side.

I adjusted the flow in the reactors, so the carbon is running pretty at a pretty good rate and the GFO is barely tumbling in the reactor itself.

IMG_0877.jpg
alt="">
 
What kind of reactors are those? Are those the ones that Frank was advertising a few months ago? I don't remember the name. Have you used them before and are they easy to service?
 
@DheereCrossing wrote:
What kind of reactors are those? Are those the ones that Frank was advertising a few months ago? I don't remember the name. Have you used them before and are they easy to service? said:
Next Reef Reactors... Yep, those are the ones Frank was advertising awhile back. I like em, I prefer the thumb screws to the 2-little fishy type screw down and they are nice large chambers and easy to change.
 
I do get excited about new corals, those of you who know me know that with each coral I put into the tank there is a bit of excitement that goes along with it. One of the primary reasons this is true is that I do not put just anything into my tank(s). I don't put anything that I don't like or don't think about before hand. I consider where it will go, what to place it next to to best display its colors and attributes etc.

I don't just put coral in the tank to have coral in other words :)

Well, my wish list is short and very hard to find (these days) corals. I am happy to introduce to you the one chalice that I have actually had to wait 4-5 months to obtain.

I give you the Prism Chalice via Juicy....

d2249db7d70012cd9e21f8b53414ef7b.image.400x347.jpg
alt="">

My single eye frag arrived this morning and I was so excited I needed to get on here and post it. This is one of the most unique and colorful chalices around at this time. There is some debate on if its a chalice or not, it may be a type of favia but one thing for certain, to quote Billy Crystal...."It's simply marvelous........."


Next on the list.... those should round out the 'collector' corals that were planned to go into this tank.

Aquarium City Selago
Upscales A.Microlados
ORA German Green Acro with Purple Polyps
Afterburner Chalice
 
Got some really nice zoanthids and palys from Bill yesterday... here are a few quick shots, nothing fancy and yes that white stuff is white :) Dead coraline will do that when its been sitting in the garage for a week then re-installed. These are actually in the frag tank for now. I'll find proper homes for them in the 300G once they settle in.

There are a few others on the big rock with those cream colored palys that I need to frag off which were the reason I bought the rock to begin with. They were closed when I took these shots, but are really a very cool zoanthid, with multi-colors of red, lavender, yellow and orange. Kind of a calidoscope of colors with some interesting patterns.

Bill uses some names that he is used to, and I'll attach the Zoaid names as much as possible on these. Bill if you recall what you call them, let me know and I'll add them next to these...

Organism Palys

IMG_0878.jpg
alt="">

These are Star Wars Palys, due to the silver mouth. Those were Ultimate Frags name for it, though they are similar to the Darth Mauls, but at this size they don't have the thicker red spokes yet.

IMG_0879.jpg
alt="">

Xmen Paly's per Bill's and I concur, also known in some circles as Lunar Eclipses. There was a lot of debate on the Xmen vs Lunar and most of the folks agree that they are the same morph, just different lighting conditions make the faint spots/dashes appear. I'll probably cut this in two and keep one high and one low to demonstrate or encourage the color changes at a later date.

IMG_0880.jpg
alt="">

Forgot what Bill called these... but they are very colorful.

IMG_0881.jpg
alt="">

Raspberry Cremes

IMG_0882.jpg
alt="">

Forget the name on these as well :)

IMG_0883.jpg
alt="">
 
Well I am losing my first acro in the new tank...

This tabling acro started to RTN earlier today. Hoping it is one of those cases where it just stops, but not too likely. This one had been coloring up nicely and actually growing a bit, just one of those frustrating things about Acro's.......

IMG_0777.jpg
alt="">
 
Top