
Guys, one of the standard complaints I come across are those darn micro-bubbles you see in your main tank. They obscure the view, and can ruin picture-taking sessions.
So the first thing you should do is see if your return pump is too powerful for your setup. All you need is a pump that moves 3x to 5x the volume of the display tank. So if you have a 100g tank, the return pump only needs to move 300 to 500 gph. If you have a pump that moves more water than that, you might be encountering this problem. There are a few solutions:
*Get a smaller return pump.
*Get a longer sump, which allows more time for water to travel and let's the airbubbles rise and pop.
*Install a bubble trap before the return section in your sump.
*Attach an elbow to the return pump's intake to suck water from the bottom 1" of water in the sump.
*Put LR in the return section to act as an obstacle to inhibit the bubbles from entering the pump.
Or my favorite...
Stop the bubbles at the source. Thus, the Bubble Tower concept.
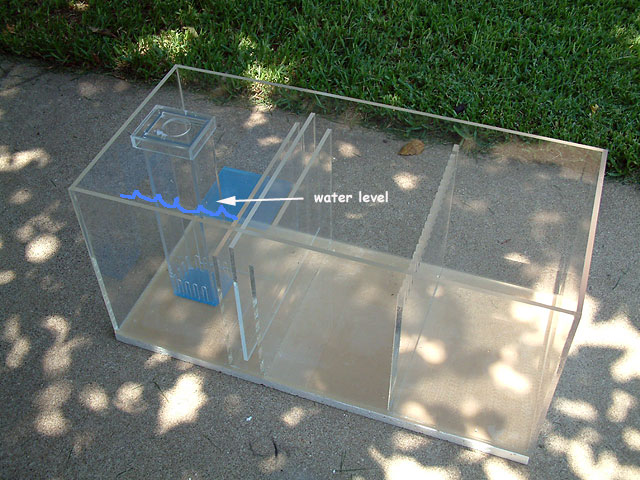
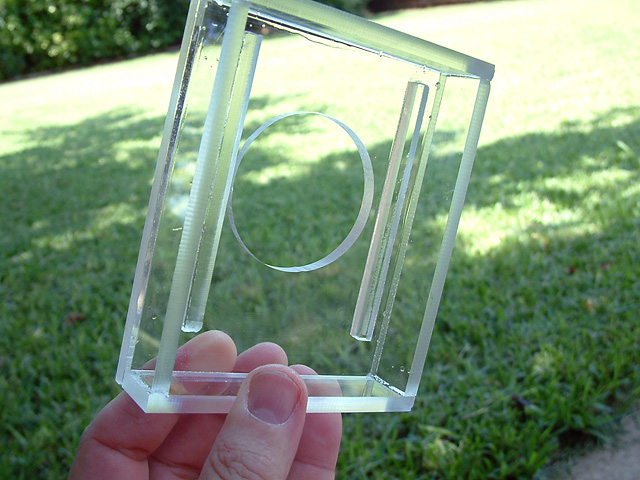
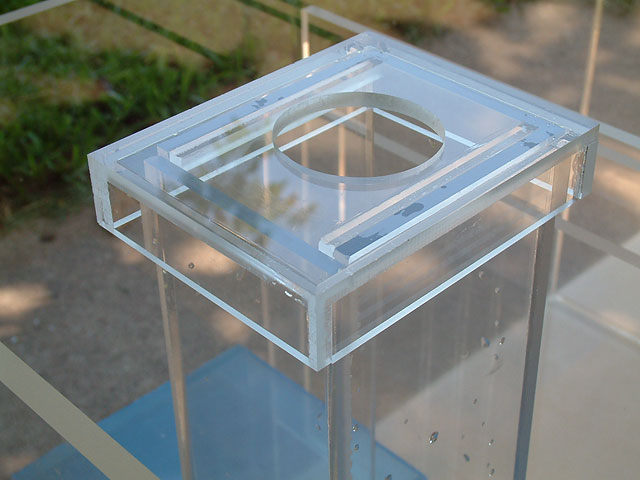
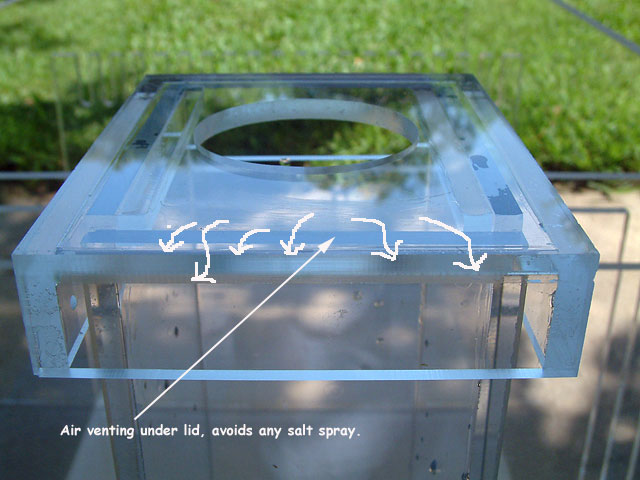
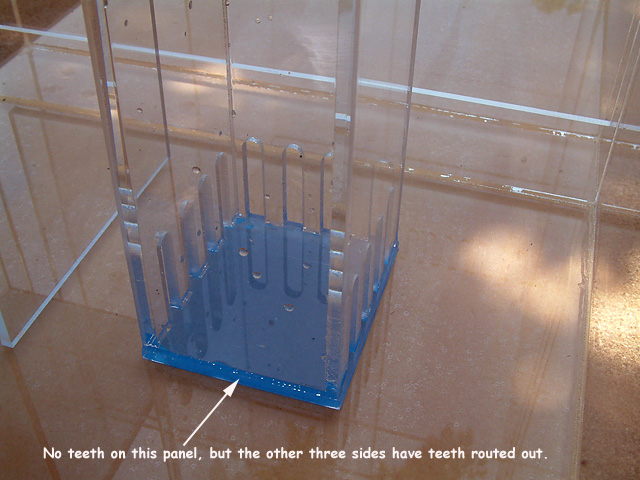
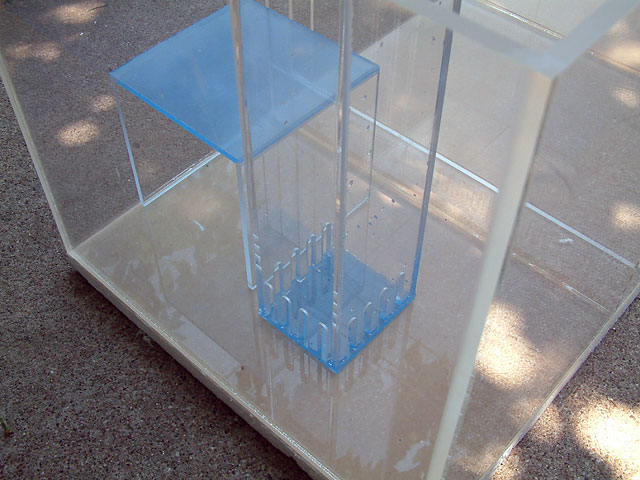
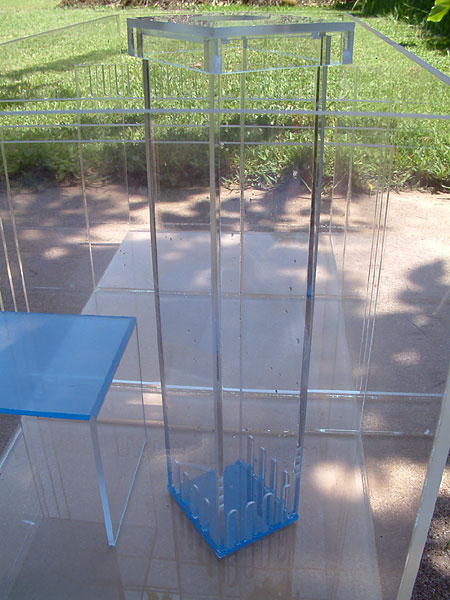
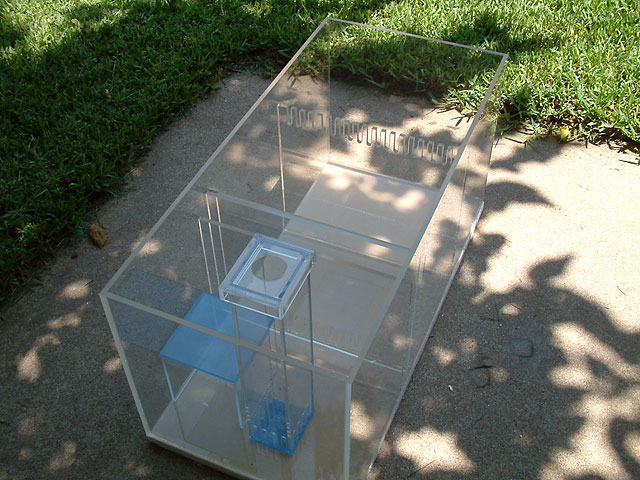
So here are a series of images to help you create your own bubble tower to put in your existing sump, as it may be too late to glue one in at this point. Many sumps that I build have a corner tower installed, but here is a sump that needed a little more flexibility.
 alt="">
This bubble tower is easy to remove, or to place where the owner needs it to be. It is constructed with 1/4" extruded acrylic and Weld-On #4. The tools I use are listed on this page, so take a look if you haven't seen it before: http://www.melevsreef.com/tools.html
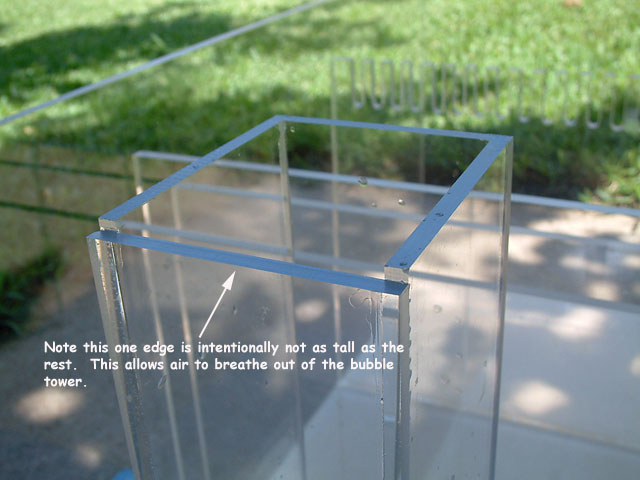
The principle behind the bubble tower is to create a tall column that the tank's drain line will pour into. If the tower is filled with live rock rubble only as high as the water level it is standing in, the bubbles will boil off within the walls and reduce them dramatically. The rubble should be fully submerged under water, with none of it exposed to air.
Here is a brief 1.2 meg video of a bubble tower doing its job: http://www.melevsreef.com/video/trapped_bubbles.wmv
So the first thing you should do is see if your return pump is too powerful for your setup. All you need is a pump that moves 3x to 5x the volume of the display tank. So if you have a 100g tank, the return pump only needs to move 300 to 500 gph. If you have a pump that moves more water than that, you might be encountering this problem. There are a few solutions:
*Get a smaller return pump.
*Get a longer sump, which allows more time for water to travel and let's the airbubbles rise and pop.
*Install a bubble trap before the return section in your sump.
*Attach an elbow to the return pump's intake to suck water from the bottom 1" of water in the sump.
*Put LR in the return section to act as an obstacle to inhibit the bubbles from entering the pump.
Or my favorite...
Stop the bubbles at the source. Thus, the Bubble Tower concept.
So here are a series of images to help you create your own bubble tower to put in your existing sump, as it may be too late to glue one in at this point. Many sumps that I build have a corner tower installed, but here is a sump that needed a little more flexibility.
This bubble tower is easy to remove, or to place where the owner needs it to be. It is constructed with 1/4" extruded acrylic and Weld-On #4. The tools I use are listed on this page, so take a look if you haven't seen it before: http://www.melevsreef.com/tools.html
The principle behind the bubble tower is to create a tall column that the tank's drain line will pour into. If the tower is filled with live rock rubble only as high as the water level it is standing in, the bubbles will boil off within the walls and reduce them dramatically. The rubble should be fully submerged under water, with none of it exposed to air.
Here is a brief 1.2 meg video of a bubble tower doing its job: http://www.melevsreef.com/video/trapped_bubbles.wmv