My new sump

melev

Club President
Staff member
Board of Directors
Sponsor
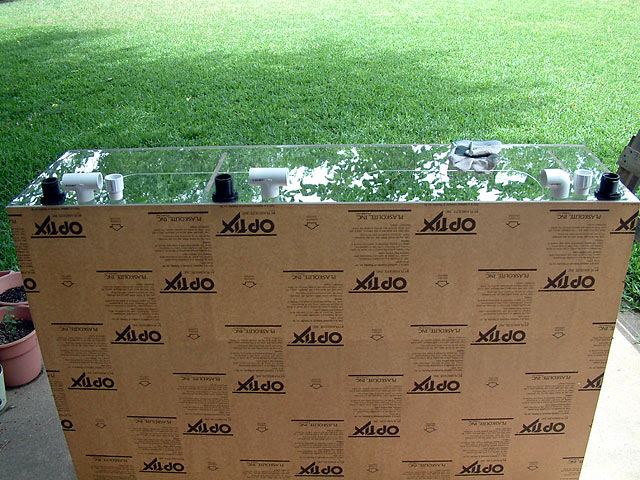
[For 8 months, all I've talked about is the new sump I was going to build. Finally got it done, and Larry and Keith came over to help with the installation and removal of the old sump.

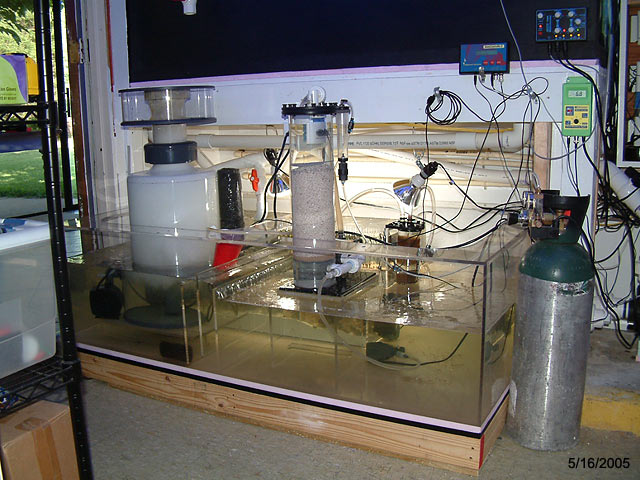
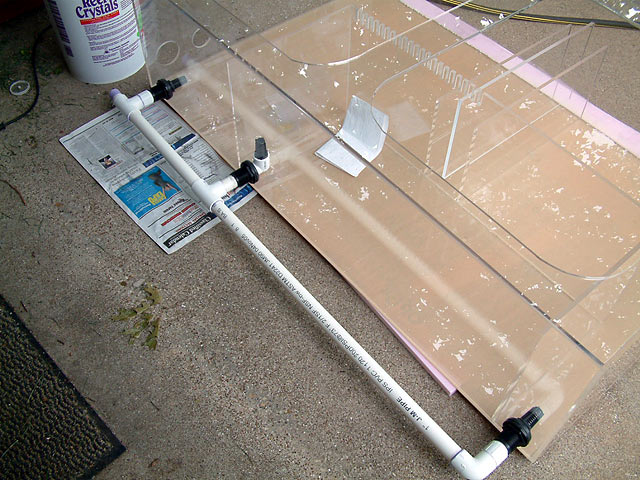
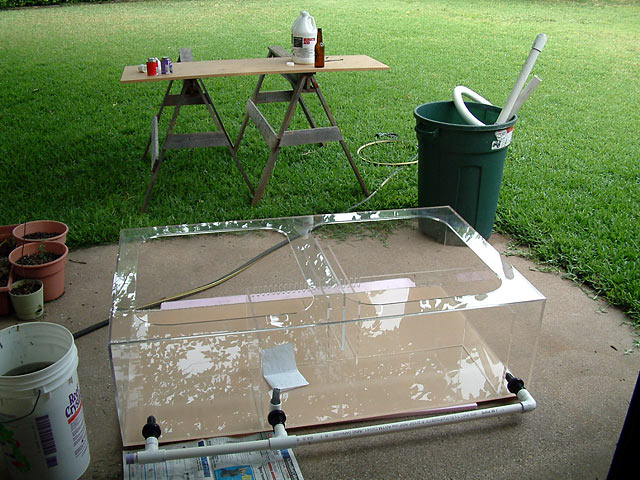
The sump is basically 60 x 36 x 16, and holds about 150g of water to the top. I'm running it at about 80g currently.

my_sump1.jpg
alt="">

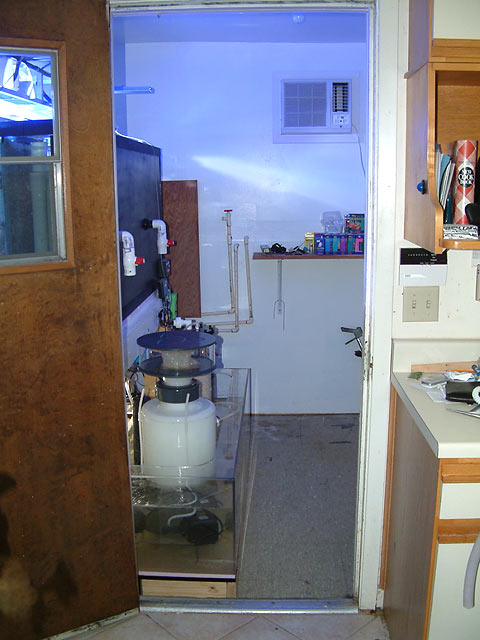
The doorway got a little more crowded, but I'm happy.

my_sump_doorway.jpg
alt="">

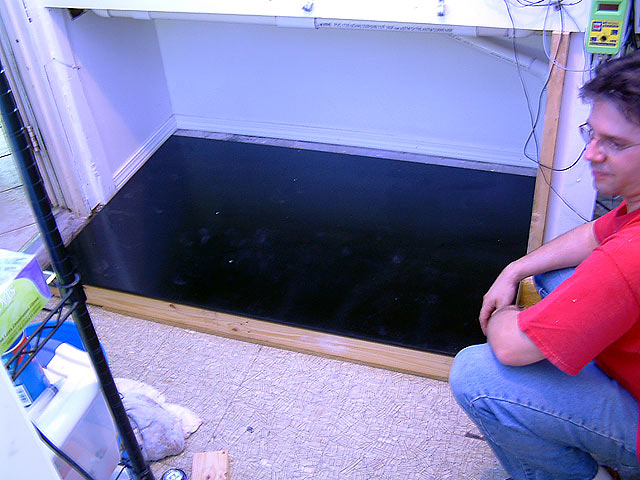
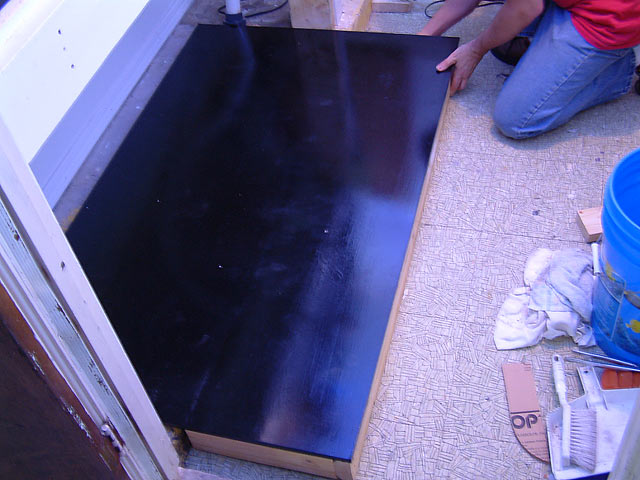
Here is the platform that was installed before the new sump went in. It is treated MDF, with a coat of polyurethane on all sides and edges.

platform1.jpg
alt="">border="0" alt="">

platform2.jpg
alt="">]
 
[Here's what the skimmer pulled out within 20 minutes of the sump running.

er_20min_skimmate.jpg
alt="">

er_20min_skimmate2.jpg
alt="">

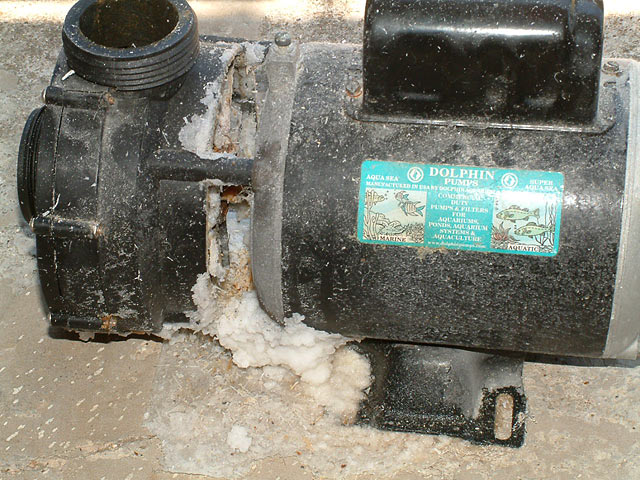
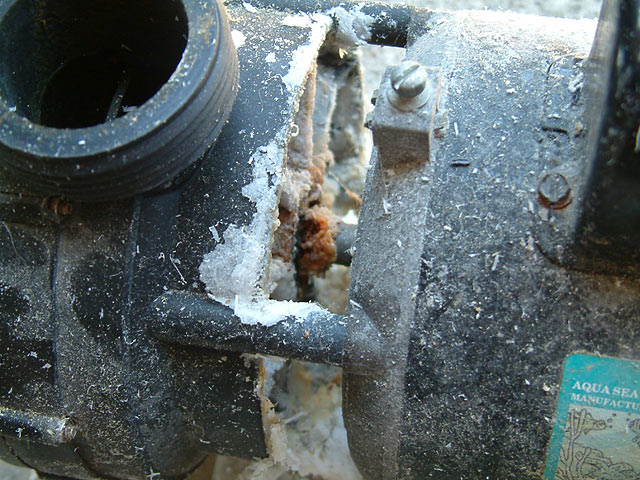
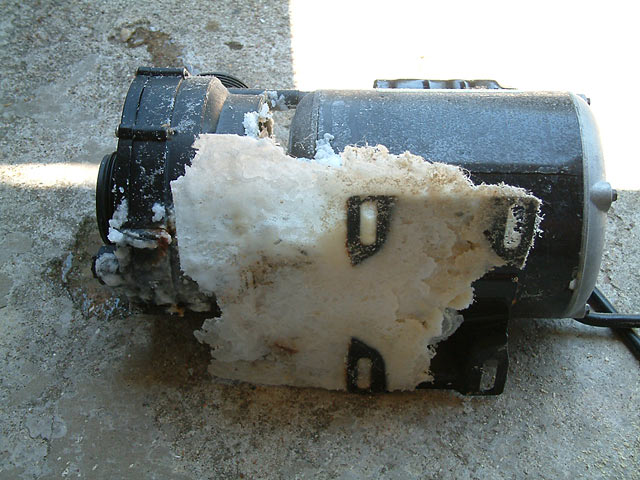
And here is the Ampmaster Dolphin 4700 that I'm retiring at the moment. At the very least, it needs some type of repair, I guess.

Maybe the warranty will cover the salt creep issue?

salt_creep3.jpg
alt="">

salt_creep2.jpg
alt="">

salt_creep1.jpg
alt="">

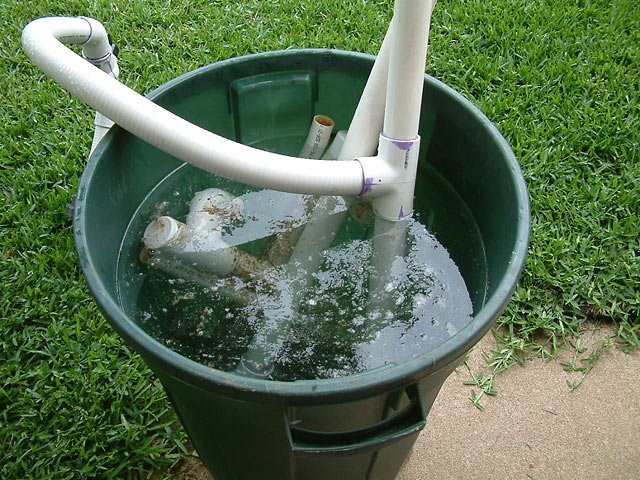
Here is how the plumbing was soaked. Btw, I think I learned something new about muriatic acid. It apparently doesn't mix all that well, and thus it made clean up a real tough job. My guess is that 2g of acid sat at the bottom of the 20g of water, and never created the acid wash I intended. Next time, I'll drop a running pump in there to thoroughly mix it.

The reason I know this wasn't mixed well is because when we dumped it out, my yard started sizzling non-stop, while nothing that was put in the barrel bubbled at all. I had to rinse my yard for 10 minutes last night to avoid killing plants and trees.

soaking_w_acid.jpg
alt="">]
 
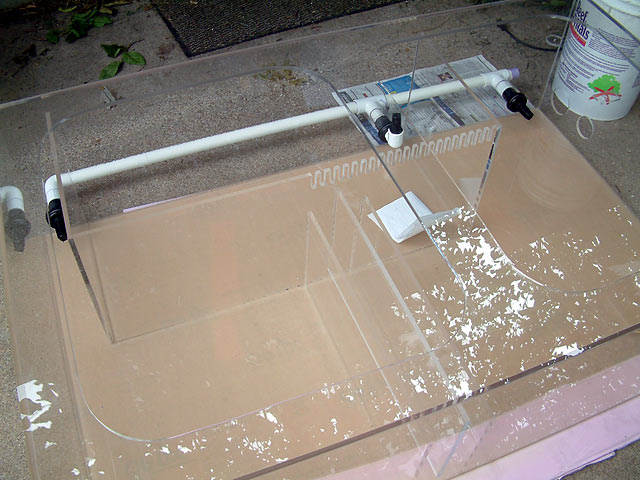
[I wanted to make water changes easier, so I intentionally designed the sump to drain all compartments via some plumbing in the rear, out of the way. However, I didn't think it out completely, because as I added water to the refugium, I quickly realized that the water level would level out in all sections due to the combined drainline.

Pretty dumb move on my part, but not so bad that it can't be resolved.

Here are the three 1" bulkheads, with some plumbing fittings I was about to use.

wc_4.jpg
alt="">

Each bulkhead has a screen to keep bigger stuff out of the lines, like wandering snails, urchins, peppermint shrimp, or even a lost fish.

wc_1.jpg
alt="">

The refugium has an elbow to turn the screen upward, to avoid sucking in any sand during a water change.
wc_2.jpg
alt="">

So there it is, ready to install. Again, this was designed incorrectly, and doesn't work as planned.

wc_3.jpg
alt="">

What I'll do in a couple of weeks is drain the sump, pull it forward, and cut those plumbing mistakes off. I'm going to run three independant lines to a common drain line. Using three gate valves or ball valves will work, but I'm playing with the thought of using sprinkler electronic valves instead. The price isn't too bad. Three valves would run $11 each, plus a simple controller for $20. There is enough room to use them. I'm thinking it would be wise to unplug the control panel when not in use, to avoid those accidently opening up during a power surge or other electrical event.]
 
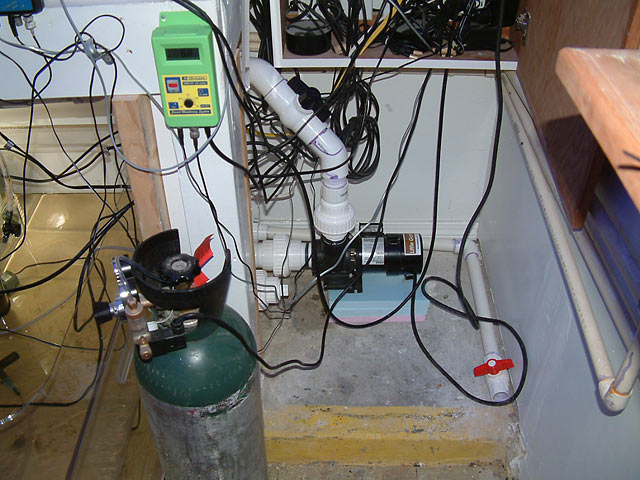
[The new return pump is a Little Giant. I don't know the model number by heart, as it is a random #. Forgive the mess...I'll tidy it up later.

little_giant.jpg
alt="">

Here are some differences.
Ampmaster 4700: Intake 1.5" - Outlet 1.5" GPH is something like 4000gph, although I think I was getting 3600gph in my reef.
Uses proprietary fittings or connections, which really are a headache to reuse. I may have to order more instead for the day I have to use this pump again.
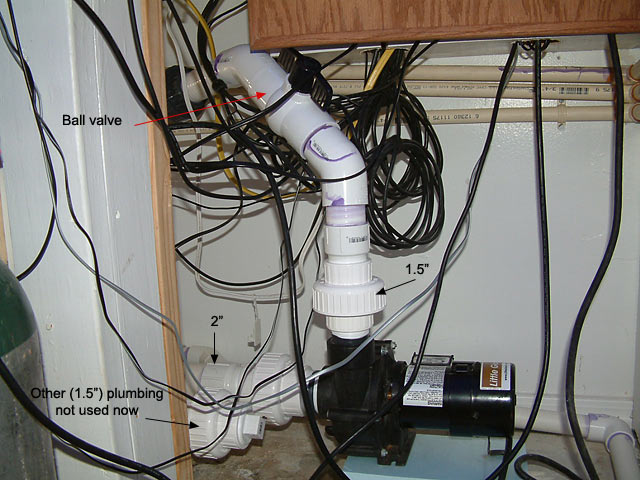
Little Giant: Intake 2" - Outlet 1.5"
Normal fittings. 3000gph, which is just fine. Runs absolutely
silently.

Btw, let me just state that it really sucks when you get everything done, and turn on the pump and it does nothing. Nada. Zilch. Zip. I moved the plug to three different outlets, inspected the driveshaft that I could not access anyway, and then on the third attempt it fired up. I really didn't want to have to drain water from the sump, close off the plumbing and take the pump offline only to figure out that it would start fine once disconnected. :( I'd tested
it yesterday for 10 seconds dry, and it started right up. If this becomes a regular situation, I'm going to be really upset.

The new sump has to return pump bulkheads. There is a 1.5" one, ready if needed, currently plugged on the inside and outside to avoid any leaks. (Hope they work.) The other bulkhead is a 2", which I'm using for this pump. I suppose I could have just used on bulkhead, and downsized when necessary, but I had the room and felt it might be easier one day.

The return plumbing over the LIttle Giant won't work on the Ampmaster, so if needed, I'll disconnect the unions and insert a different return section at that time. Not exactly plug and play, but definitely reconfigurable if needed.

I have to buy more locline. I found lots of cracks in several joints. Perhaps the acid ruined these, I"m not sure. Oh well.

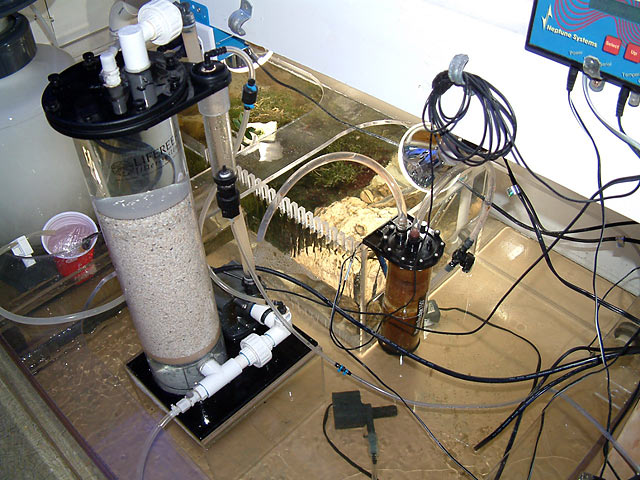
The Calcium Reactor is in the sump now. I like this because it clears up some floor space, shortens the tubing going to and from the reactor, and if there is a leak (like a few weeks ago), the water stays in the system and no more water is added via top off.

ca_reactor_in_sump.jpg
alt="">

Currently, the entire reactor is on a stand where none of it is in the

water. However, I probably going to make a secondary stand to lower it in the water during the winter months. The heat from the Mag 7 will warm up the water sump, which is running anyway right? Might as well use it instead of paying for a heater to do the job.

Btw, without the sump running for the past 24 hours, the tank didn't even reach 80F today. Last night, I put heaters in the refugium and in the display, but totally forgot to flip on the heater switch on the power center, so they didn't turn on until 3am. The tank was 79.1F, so it wasn't a big deal, but I was surprised at first to see the temperature dropping with heaters hooked up. Glad I caught that little error early enough. It should be interesting to see how much heat the new pump generates.

Next, I'll explain the plumbing connections.]
 
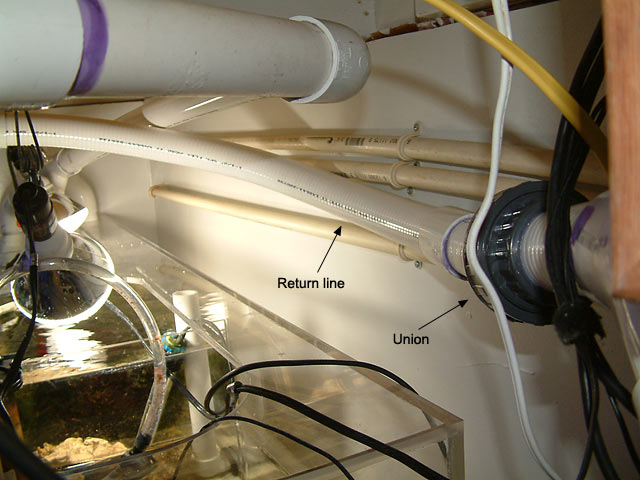
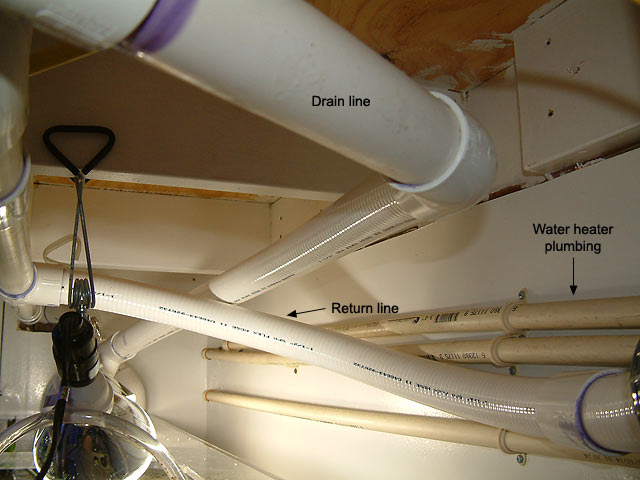
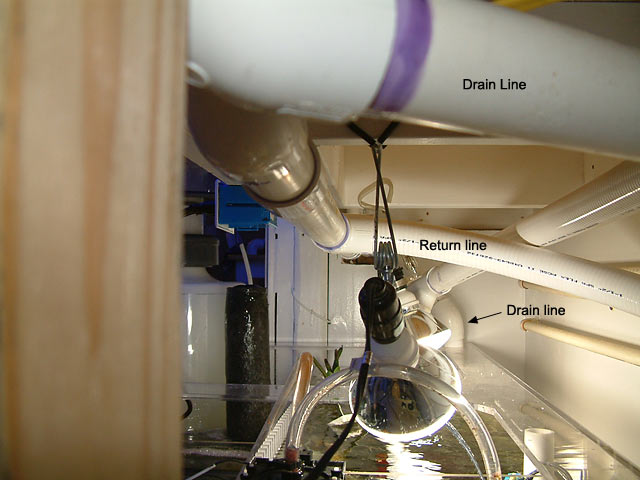
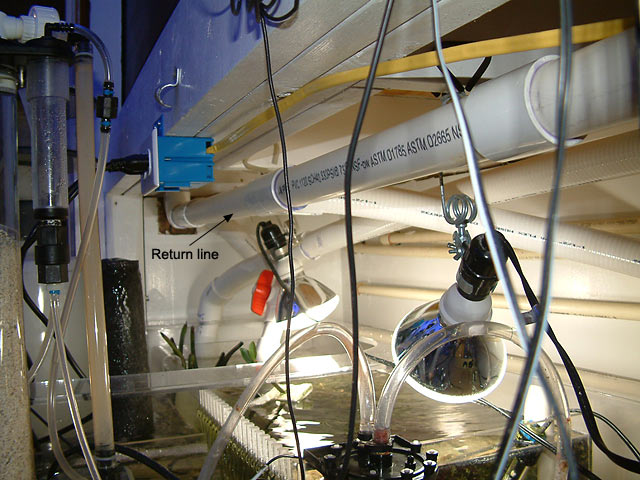
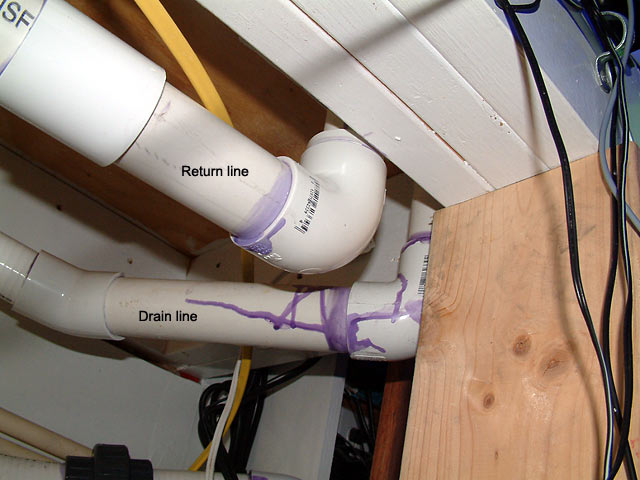
[The return plumbing starts at the pump, or return pump. I've used PVC and Spa Flex tubing to create an easy design that maximizes flow. Any extra connections and more friction and reduce flow, but you'll see a few extras since I reused some plumbing. If you are starting from scratch, you can probably skip a few connections to keep things nice and tidy.

Note the text in each image to help identify some of the plumbing parts.
return_pump.jpg
alt="">

The pump pushes water up through a union, into a ballvalve that can be closed or adjust to throttle back the flow. From there it goes into spa flex tubing. A union allows me to remove this entire section if necessary.

return_union.jpg
alt="">

This sweeping curve then leads into a Tee fitting. All plumbing is still 1.5" at this point. You'll also see one of the drainlines in these images, from the right (rear side) of the tank, which flow to the left (far) end of the sump.

return_flex.jpg
alt="">

You can barely see the second drainline in the back corner, from the left end of the tank.

return_from_end.jpg
alt="">

The ballvalve you see allows me to control how much water pours into the refugium from a single drainline. The rest pours into the skimmer section.

return_tee.jpg
alt="">

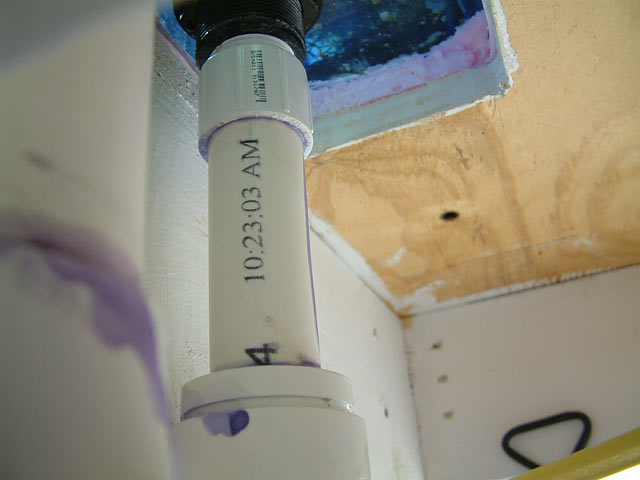
The water is evenly distributed through this 1.5" rigid PVC to both ends of the tank. Here is one end, on the right rear of the tank.

Note the elbow pointing up is 1.5".

return_elbow.jpg
alt="">>

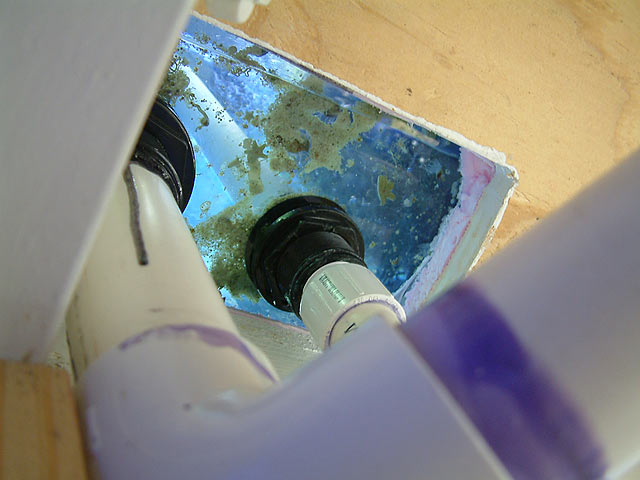
At this point a bushing is glued inside, then a 1" pipe rises up to the 1" bulkhead.

return_reduction.jpg
alt="">

return_bulkhead.jpg
alt="">

Best of all, no drips!

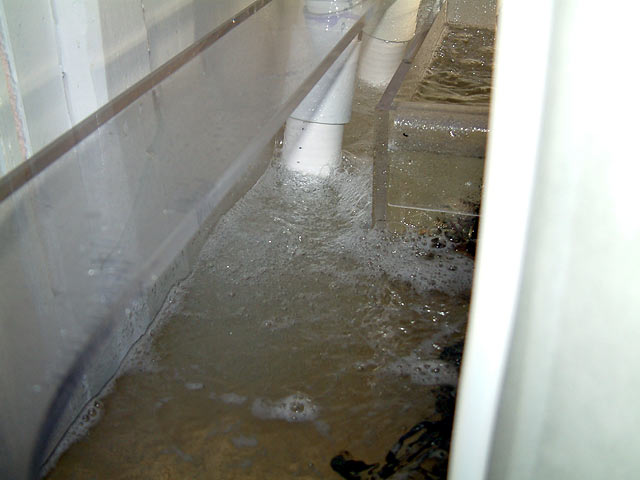
Here is a picture of the water entering the left rear corner of the sump, quietly and without creating a billion bubbles.

drain_bubbles.jpg
alt="">

The loudest thing in the sump currently is the Euro-Reef riser/overflow tube. Once that is modified, the fish room will be pretty quiet overall, as long as the window a/c unit doesn't start making strange noises.

Btw, as a friendly FYI:

Don't spill purple primer on acrylic. During the connection of the drain line over the sump, I accidentally bumped the item the primer was sitting on (I did think to put something to catch drips), and the can splashed out some primer on the acrylic. It was wiped off within 20 seconds, thanks to Keith, but the acrylic crazed with a bunch of micro cracks in the flange. Disgusted, was I (in a Yoda voice), but oh well. I guess if any fool tries to break in an steal my sump one day, this will be the "identifying scars or birthmarks" the
police tend to ask about. The sump isn't discolored by that product, but it definitely can ruin acrylic if given the chance.

Since the new pump has been installed, the reef temperature runs 79.7 to 80.2. Maybe it will be easier to keep the tank cooler this summer versus last year.]
 
[A few noteworthy things from today:

The copperband butterfly is still doing well, and was out briefly a few times. Looks like it got a few featherdusters, but the aiptasia population seems unchanged in the back of the tank. I'm hoping it will become more and more courageous, so that it can cruise the reef as it wishes.

The pseudochromis elongata appeared for about 2 seconds, and then was out of sight again. Getting a picture of it will be unlikely. Should have done it when it was in my hand. It was discovered in the old sump by Jimmy during the change over. I thought it had died many months ago.

I turned off the Tunze Silphos pump last night while feeding. When I do this, that cylinder full of media drops like a bomb. I don't know if it is supposed to hang on tightly, but this has happened twice. I turned it on this morning, but for about 12 hours, it wasn't processing the water unfortunately. It appears my phosphate reading is 1.5 or maybe 1.25. So it is indeed coming down.

The new skimmer pulled out about 1/4" to 1/2" of skimmate, so I washed it out as the neck was already gunking up. After feeding tonight, it quickly bubbled up large bubbles and about 3/8" of wet skimmate. I opted to turn it off for an hour or so, since the sun coral usually eats during this time. I'd rather leave whatever planktonic food is still in the water for the next hour or so, then I'll restart the skimmer.

One fitting over the new pump is leaking. It was an annoying drip, so I tightened it and now it leaks a bit more than before. :(

I had the a/c unit at 79F in the fish room today, and the heaters actually turned on to warm up the tank. I can't believe it. So I bumped up the a/c unit to 80F. I really wonder how this will all level out during the summer months. I'm sure running the a/c at 80 instead of 77 like last year will help a little on the monthly power bill.

I was talking to awerna (He's a RC member, located in Germany) and we talked about a sump he wants. Our conversation covered a lot of other subjects, including my annoyance with aiptasia. Turns out people in Germany are having amazing success with Joe's Juice. We discussed the
process, and I'm going to try to follow his guidelines for now. It isn't tough, but I'm going to have to be more proactive. Rather than hitting 200 aiptasia in one day, then expecting them to disappear miraculously, he suggested I target a few at a time every day until I can't find any anymore. Since sections of my reef seem to have a super-abundance, such as on Fraggle Rock within all the Montipora digitata, I'll probalby start my focus there. If I do this daily for a few weeks, maybe I can reduce the population to such a small scale that the Copperband will help me finish off the last of them.

A few weeks ago, I posted images of the Bergia Nudibranchs, which are known to eat only aiptasia. Well, I can't find them, and I have double to triple the amount of these stupid glass anemones in my frag tank, so I "juiced" them all tonight, and will be returning the rocks back to the reef. Hopefully, Nibbles will leave all my pretty zoos alone. They've made a full recovery.

Lastly, looking at the corals today, I have to say that they appeared to be more vibrant than they were just a few days ago. Maybe that is just a mental hope on my part. Honestly, my tank has lots of pretty corals in it, but some of the SPS that I've lost make it look less than it was before. This annoys me, because it translates into my lack of proper care. I don't like losing any livestock, period. Coralline algae is pretty much non-existant in my tank, so that tells me just how much the water quality has shifted from just a few months ago. Ca and Alk are pretty much within line, as well as salinity.

The PO4 has a lot to do with it, I'm sure. My old sump had plenty of coralline in it, so perhaps I should switch my 1220w of light to a couple of my 19w 5100K refugium bulbs. LOL]

 
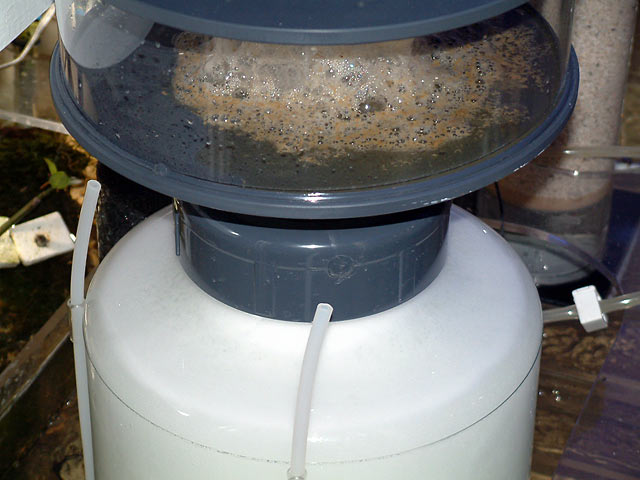
[Here are pictures of the new skimmer in action. It is a Euro-Reef 12-2. Jimmy Walls has several of these for sale, so contact him in his forum (Big Fish Aquatics) if you're interested.

full_skimmer.jpg
alt="">

skimmer_base.jpg
alt="">

This is what accumulated after dinner (feeding time) before I shut off the skimmer for an hour. During dinner, the sump is off to keep the food in the display.

after_dinner_skimmate.jpg
alt="">

Here is a picture of the water entering the refugium. I have the 90 degree elbow pointed away from the teeth, so water has to circulate to get back across and exit. The surface ripples gently, and the southdown has remained undisturbed. I almost want more flow in there.

fuge_flow.jpg
alt="">

The water is so crystal clear at the other end of the fuge, it is almost invisible.

clear_water.jpg
alt="">

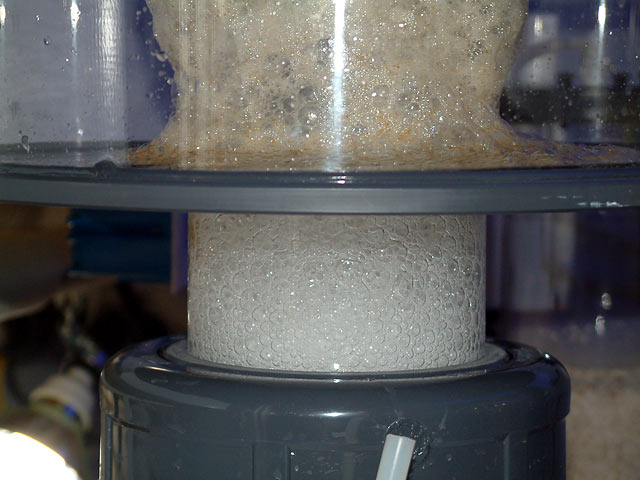
The water drains into a section next to the refugium, and travels into the area where the skimmer sits. Here you can see how many bubbles are moving through the skimmer zone.

micro_bubbles_entering.jpg
alt="">

And after the bubble trap, you can see how many bubbles are being created by the water cascading over the final baffle. (The acrylic you see to the right of the bubbles is part of the Calcium Reactor stand, and is not a baffle at all.

micro_bubbles_at_baffle.jpg
alt="">

And you can see how bubble-free the rest of the return section actually is. Plus, there is plenty of room for frags to grow if I decide to go that route.

return_section.jpg
alt="">

One more shot of the section with the Ca reactor stand. I'm not sure what the flow is going through the sump, but I believe this pump can move 3000 gph at 0 head. I'm probably moving 2600 or more GPH now.

return_section_bubbles.jpg
alt="">

Tank temperature at midnight. I opened the door to the garage, and shut off the a/c unit tonight.

temp_ph.jpg
alt="">]
 
[Let me guess, the above was TMI (too much information) ? I thought some of you might be interested to see how it came out, after all the months of my talking about the new sump.]
 
[It really has changed, using the new sump. Temperature and humidity mainly. With the window a/c unit off, the room get hot and moist very quickly. With the unit set to 79F, the tank doesn't even reach 80F, and I just saw that the heaters were on!!!!!!!!!! :lol: I bumped the a/c to 80F. It might be running at 81F soon, just to avoid running the extra expense of heaters.

I suppose the Ampmaster and the Mag 12 added quite a bit of heat. Now I have the Little Giant return pump and two Sedra 5000 pumps for the skimmer, and the tank has easily come down 2 degrees ever since.]
 
[Looks great Marc! Many of us wish we had that much room to work with. I feel where you're coming from on the coral health. I'm becoming a firm believer that it takes 6-8 months for a tank to settle in and things start really expanding. My 115 is growing leaps and bounds right now, just before I move it all over again...

I found this wonderful product at Home Depot called tileboard. It's about 1/8" thick, but has a porcelain looking finish to one side that is waterproof. I'm going to use it extensively in this new system. You might look into it next time you need something waterproof.]


Edited By tesfeld on 1116512747
 
[Marc,

I have an idea on you water change drain issue. Why not just extend the PVC up higher in the fuge so that it doesn't drain as much into the rest of the sump?

That way you still get the advantage of being able to drain some of the fuge but not all of it (in the event your wc takes a while) and in a power outage the fuge only drains to the top of the PVC instead of completely even with the rest of the sump.

Unless you were planning on draining the fuge completely during your WCs it should work OK and it won't take as much trouble to fix.]
 
[Kevin, I had my doubts about the pump at first, when it didn't come on. Everything was hooked up, and nothing. Argh! After three tries, it fired up. And yes, I tested it before it was plumbed and it worked quietly. I'm thinking about getting a Sequence Dart as a backup. It uses 160w of power, moves the same amount of water, and sells for under $200 at Premium Aquatics. Then I'll have to decide what to do with the Ampmaster pump.]
 
[Tony , thanks for the suggestion about tileboard. Is that anything like Wonderboard, the stuff made of concrete and fiberglass? What exactly will you use it for?

Here are a bunch of pictures I posted on Reef Central, along with a few growth sequence images.

http://reefcentral.com/forums....4974400

Josh , the problem is that the water level in the refugium will not get high enough with any kind of standpipe . If it isn't tall enough, any extra water will go out the standpipe and into the skimmer section instead. The only solution is to have separate pipes from each section that are controlled with valves independant of the others. Sprinkler low-voltage valves are the direction I'm leaning currently.

Thanks, Butch .]
 
Top